User identity information helps to identify the source of policy breaches, attacks or network vulnerabilities and trace them to specific users. Majority of traffic inspection products support filtering based on IP address. However, Cisco FTD identity policy feature gives the capability to control network traffic on the basis of user identity instead of IP address. It is done via mapping between IP address and user name.
In this blog, we will cover in detail about the FTD user identity feature, how it works and its architecture and configuration.
Cisco FTD User Identity
When we configure an access control policy, we can permit specific types of service for special users instead of IP addresses. The users then have to be authenticated before they are allowed to access a specific type of service. Identity policy authenticates network users and binds their IP address to username while authenticating new users.
If a deny or permit is applied for a specific service to a specific user, it will be applied to an IP address bound to that user. Let us understand this with an example:
- When we write an access control policy that User A is allowed to access service ‘X’, then we write an identity policy to authenticate users for specific type of traffic.
- User A is authenticated and its IP address 192.168.1.10 is mapped to User A username – from now IP address 192.168.1.10 is allowed to access service ‘X’ until the user is idle.
Username to IP address bindings is applied using passive or active authentication in Cisco FTD identity policy.
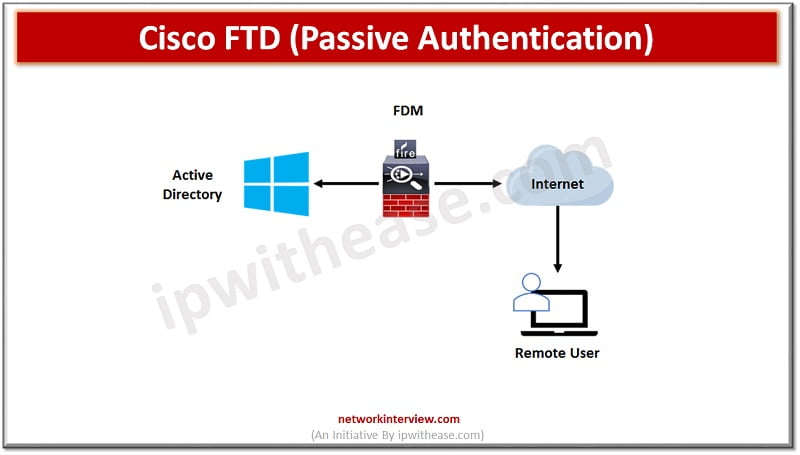
Passive Authentication
Passive authentication requires other tools which authenticate users and then give outcome to FTD. It is done through Cisco ISE dot1x authentication and pxGrid technology.
FirePower user agent queries the active directory (AD) security event logs for user logon/ logoff events and sends them to FMC. Passive authentication is transparent to all users.
Active Authentication
The user logs into a FirePower captive portal webpage, which authenticates users against LDAP/AD. When authentication is successful then the user IP address will be mapped to user name.
A ‘Realm’ must be configured on FirePower management console (FMC) to download from the LDAP/Active directory the user / group.
An ‘Identity’ policy has identity rules which associate the traffic (Source / destination network zones) with the Realm and authentication method (active, passive or no authentication). The identity policy is referenced within Access control policy and implemented on FTD. FTD is sent the user / IP bindings and group memberships.
No Authentication
With this option we can ignore some traffic with ‘no authentication’ option.
Cisco FTD User Identity Configuration (Passive)
Let us look at steps to configure passive authentication using a Realm and identity policy.
I. Configure Realms
Login to FirePower Management console (FMC)
Navigate to System -> Integration -> Realms
Click New Realm
Add domain details and click Ok.
Click ‘Add directory’
Add hostname / IP address of domain controller, port, and encryption
Click ok
Click ‘User download’
Select Download users and groups
If connectivity is ok the FMC should query and download the groups. Select groups to include and use in access control policy.
Click on ‘Save’
Click the ‘download now’ button to download groups and users within the group
Set a schedule to download users / groups as required
II. Create an identity policy
Navigate to Policies -> Access control -> Identity
Click ‘Add new policy’
Name the policy
Click ‘Add rule’
Name the rule
Define the Action as ‘Passive authentication’
Ensure ‘Enabled’ is selected
Define Zone and Networks
Click Realms & settings
From the Realm drop down choose Realm used previously
Click ‘Save’
III. Modify Access Control Policy
Access control policy is to be configured to use identity policy and define the rules used for user authentication
Navigate to Policies -> Access control -> Access control
Select existing access control policy
Click the ‘Advanced’ tab
Edit the identity Policy settings
From drop down select the identity policy
Click ‘Rules’
Create a new rule or modify an existing rule
Click the ‘Users’ tab
Click the Realm name , this should list all available users within the group and groups
Select the group to add rule
Click ‘Save’
Deploy the policy on FTD
To verify login in CLI Expert mode and type
User_map_query.pl -I <IP address> – This command determines which user is associated to said IP address
Run command cat.ngfw.rules to view the Access control policy
Run command cat user_identity.dump to view all active users with session on FTD
Cisco FTD User Identity Configuration (Active)
Let us look at steps to configure active authentication via Identity policy configuration.
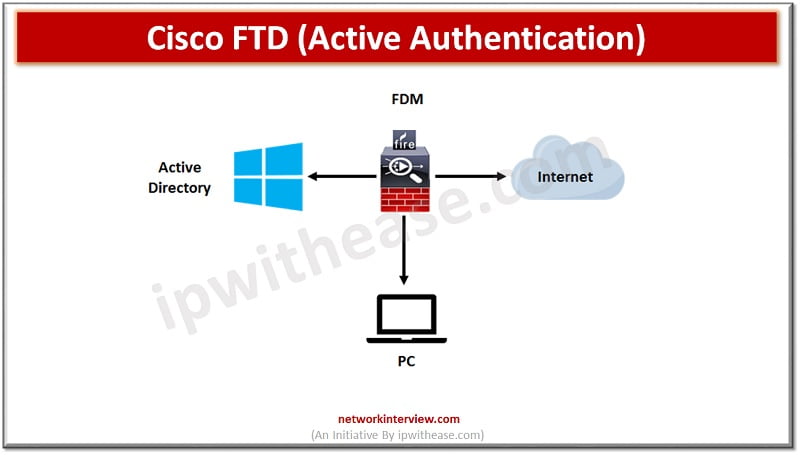
I. Cisco FTD identity policy configuration
- First create a new identity policy
- Create a rule to authenticate users for specific service traffic for example we choose all traffic from inside zone to outside zone to be authenticated
- Choose ‘active authentication’ as method
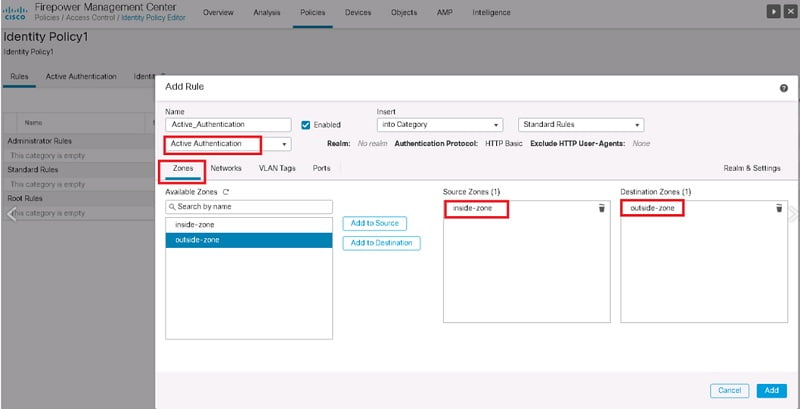
Configure and authentication database in ‘Realms & Settings’ tab.

- Click ‘save’ to save the rule, we will be asked to configure a certificate for captive portal authentication.

- Configured identity policy to be activated in access control policy.
- Give permission for some specific services to specific users or groups configured in active directory.
Continue Reading:
Cisco FTD NAT: Configure and Verify NAT on FTD