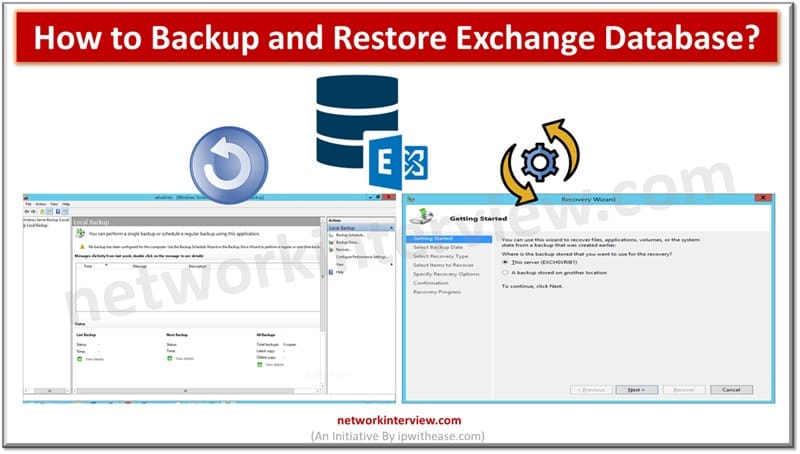
How to Backup and Restore Exchange Database?
Unexpected power outage, Exchange Server failure, or any other disaster can happen anytime. Such incidents can cause corruption in the Exchange database, leading to downtime and data loss. This is why you will always take a backup of your database so that you can restore it to resume the services quickly and prevent downtime. In this article, we will explain the detailed process to backup an Exchange database and restore it.
How to Backup Exchange Database?
Windows Server Backup (WSB) is a feature available in Microsoft Windows Server Operating System that you can use to take and manage Exchange database backups. However, before using it, you need to ensure and consider the following:
- Ensure that WSB is added to Server Manager. For this, open the Server Manager and go to Tools.
- Check if WSBExchange service is installed. For this, go to Services.msc and look for WSBExchange service.
- When taking Exchange-aware VSS backups, the VSS technology coordinates with the backup application (Windows Server Backup) and the Exchange Server.
- Individual folders and databases cannot be backed up; you need to select the entire volume.
- Backups must be run locally on the server as WSBExchange plug-in does not support remote VSS backups or remote administration.
- Backup targets include local drives and remote network shares.
Steps to follow to backup your Exchange database using the Windows Server Backup (WSB)
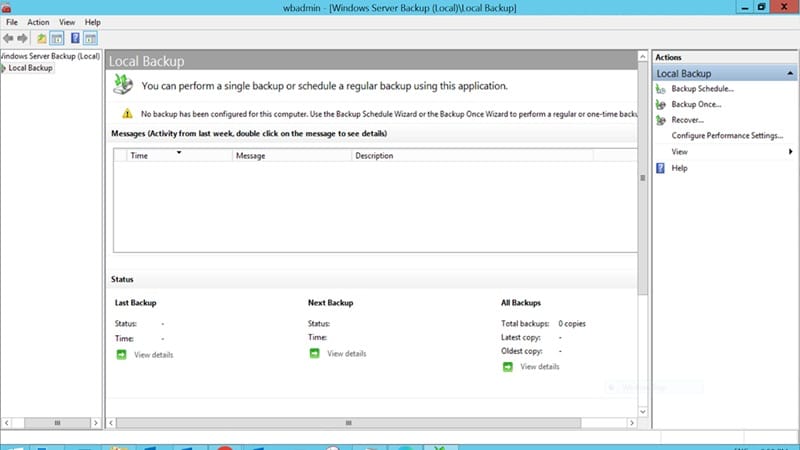
- Go to Search and type Windows Server Backup. Click on it to start it and then select Local Backup.
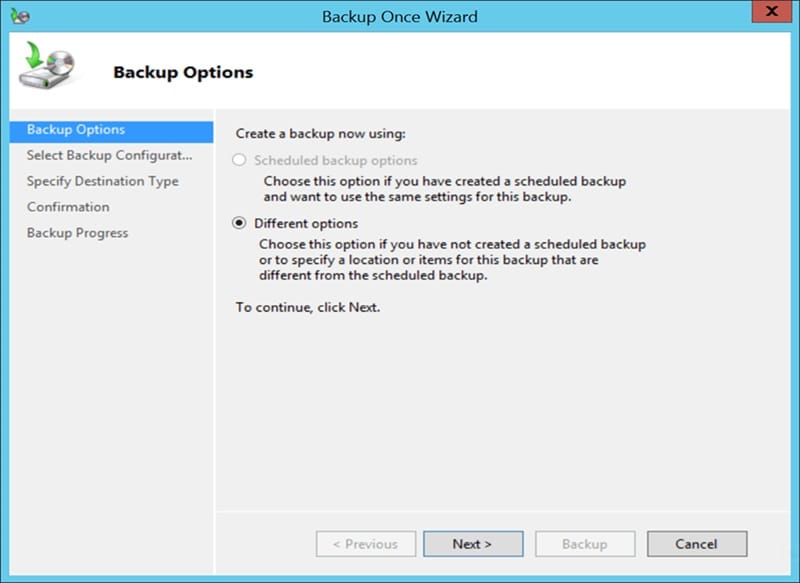
- In the Actions pane on the right hand side, click Backup Once. It will show a progress bar that will run for a few seconds. After that, you will see the Backup Once Wizard.
- On the Backup Options page, select Different options and then click Next.
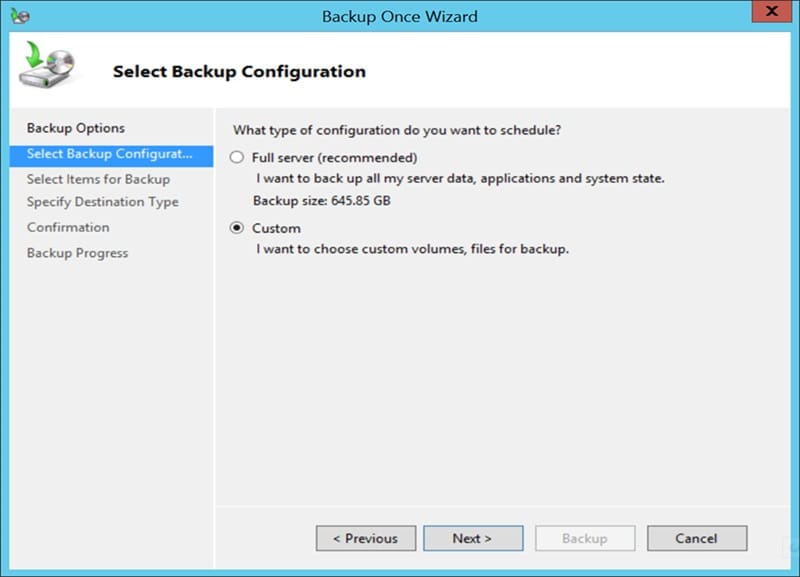
- You will see the Select Backup Configuration page. Here, you can select Custom and then click Next.
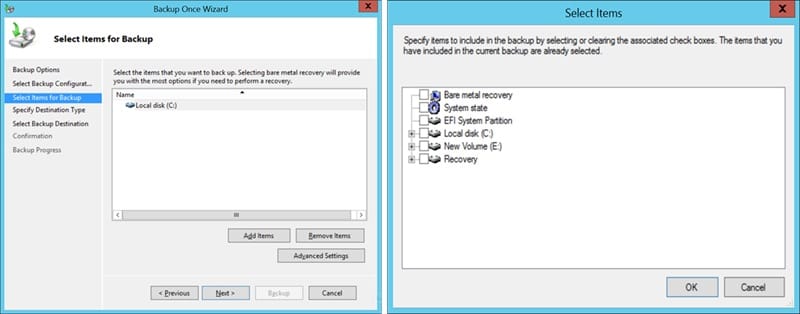
- On the page that appears, click Add Items. This will open the Select Items page. Here, select the volume/volumes to be backed up and then click OK.
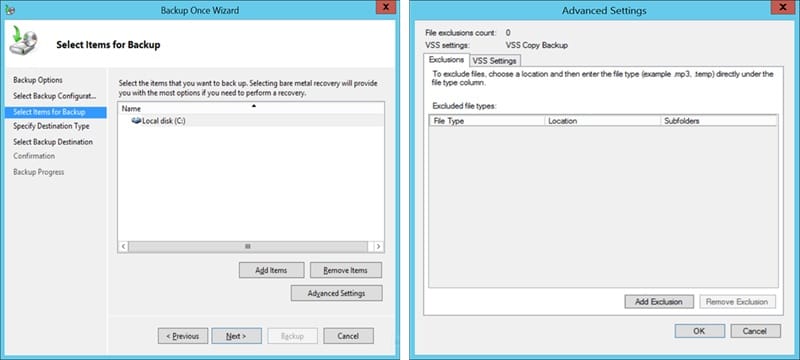
- Click Advanced Settings. On the Exclusions tab, click Add Exclusion to add any files or file types you want to exclude from the backup.
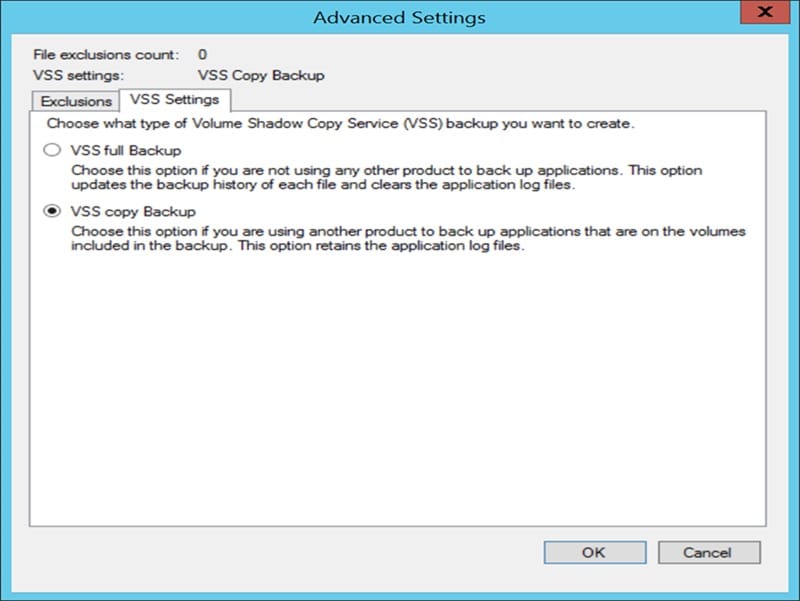
- On the VSS Settings tab, select VSS full Backup and then click OK. Then, click Next.
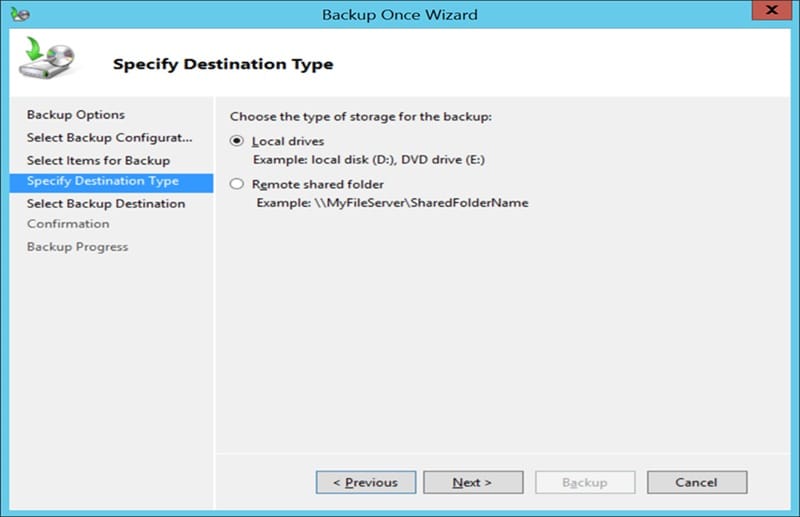
- On the Specify Destination Type page, select the type of storage (Local drives or Remote shared folder) to store the backup, and then click Next.
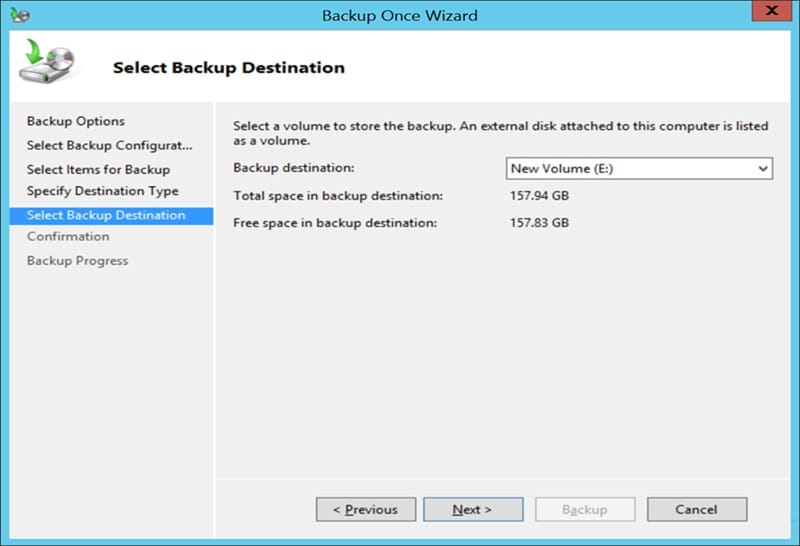
- If you’ve selected the Local drives option, you need to select the volume to store the backup. Select the volume from the Backup destination dropdown and then click Next.
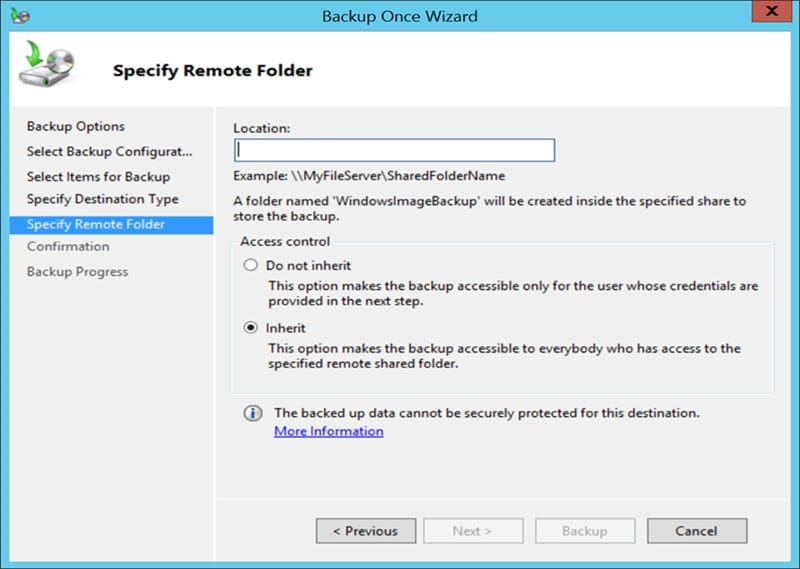
- If you’ve selected the Remote shared folder option, you need to specify a UNC path for the backup files. Under Access Control, choose Do not inherit if you want the backup to be accessible only through a specific account. Choose Inherit if you want the backup to be accessible by everyone who has access to the remote folder. Then, click Next.
- On the Confirmation page, review the backup settings and then click Backup to start the process.

- You can view the status and progress of the backup process at any given time on the Backup Progress page.
You can view the status and progress of the backup process at any given time on the Backup Progress page.
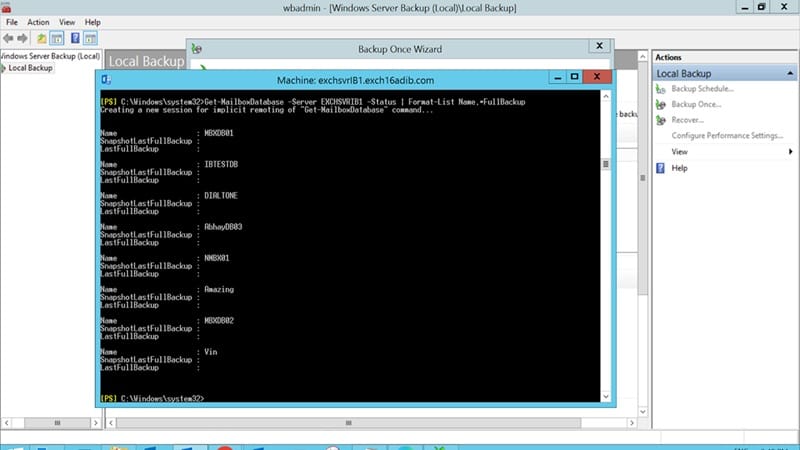
To check if the backup is created, you can run the following command in the Exchange Management Shell:
Get-MailboxDatabase -Server <ServerName> -Status | Format-List Name,*FullBackup
How to Restore Exchange Database?
If you’ve a healthy Exchange database backup, you can easily restore it when the need arises. Below are the steps to follow to restore the Exchange database via the Windows Server Backup:
- Open Windows Server Backup.
- Choose Local Backup.
- In the Actions pane, click on Recover to run the Recovery Wizard. You will see a Getting Started page with multiple options to select from.
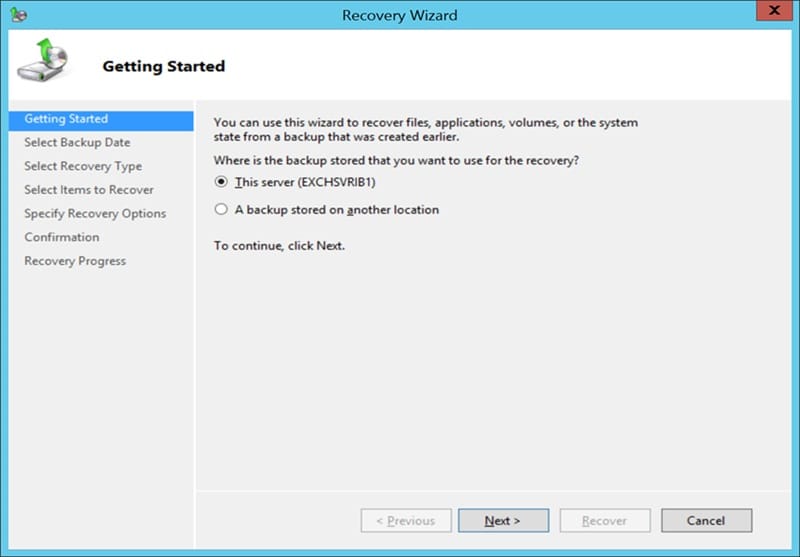
- You can choose one of the two options based on database and backup location:
- This server: If the database being recovered was backed up on the local server, you can choose this option. Then, input the server’s name and click Next.
- A backup stored on another location: If the database being recovered is from another server or if the backup being recovered is located on another computer, choose this option and then click Next.
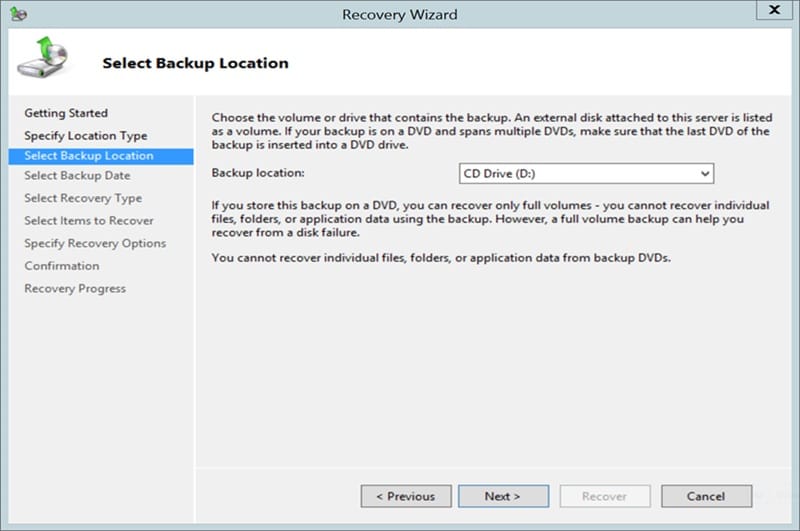
- On the Specify location type page, select Local drives or Remote shared folder and then click Next. If you select Local drives, then you need to select the drive containing the backup. Click Next.
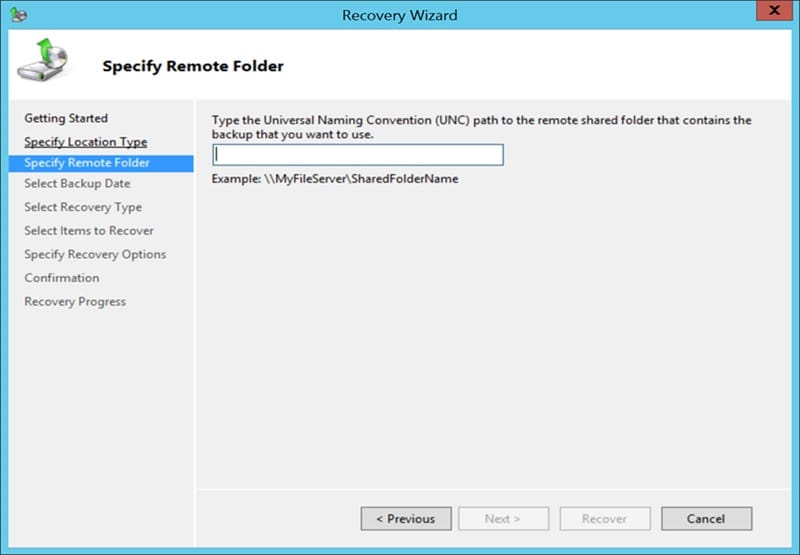
- If you select Remote shared folder, you need to enter the UNC path and then click Next.
- On the Select Backup Date page, you need to choose the date and time of the backup that you want to restore. After choosing correctly, click Next.
- On the Select Recovery Type page, select Applications and then click Next.
- Make sure that Exchange is chosen in the Application list on the Select Application screen. Here, you can view the application components of the backup by going to View Details. If this is the latest backup, a checkbox called “Do not perform a roll-forward recovery of the application database” will appear. Tick this option, if the goal is to stop Windows Server Backup from replaying any uncommitted transaction logs during the restore. Click Next.
- On the Specify Recovery Options screen, choose where you want to put the restored data and then click Next.
- On the Confirmation screen, review the settings and click Recover. On the Recovery Progress screen, watch the status of the restore and close the page when recovery finishes.
You can check the target folder to confirm if the restored files are present. Alternatively, on the server where you restored the database, review the Windows Server Backup job history/logs to confirm the restore is successful.
What if the Backup Restore Fails?
Although backup restore works most of the time, it can sometimes fail due to various issues. In this case, you can try to recover the corrupted database using the eseutil /r command (soft recovery). However, this will only work when the vital transaction log files are available. If log files are missing, you need to perform hard recovery, which can lead to data loss. To prevent data loss, you can use Exchange recovery software, such as Stellar Repair for Exchange.
This tool can recover mailboxes and other components from the corrupted EDB file and export them directly to a Live Exchange or Microsoft 365 with complete data integrity. It can also save the recovered mailboxes in PST and other file formats. By using this tool, you can save your precious time that would have otherwise been spent on restoring backup and exporting it to your target Exchange environment.
Conclusion
By following the step-by-step instructions provided in this article, you can create and restore an Exchange database. However, sometimes, even after restoration, an Exchange database may fail to mount. In this case, soft recovery using the eseutil /r command can work. However, if this fails, you would have to perform a hard recovery to recover your database. However, this operation can lead to data loss as it purges the corrupted items.
A better option is to use Stellar Repair for Exchange – a specialized Exchange recovery tool – to recover mailboxes from corrupted Exchange databases. After extracting the mailboxes, it offers the option to save them in PST or export them directly to a live Exchange Server.
Tag:storage