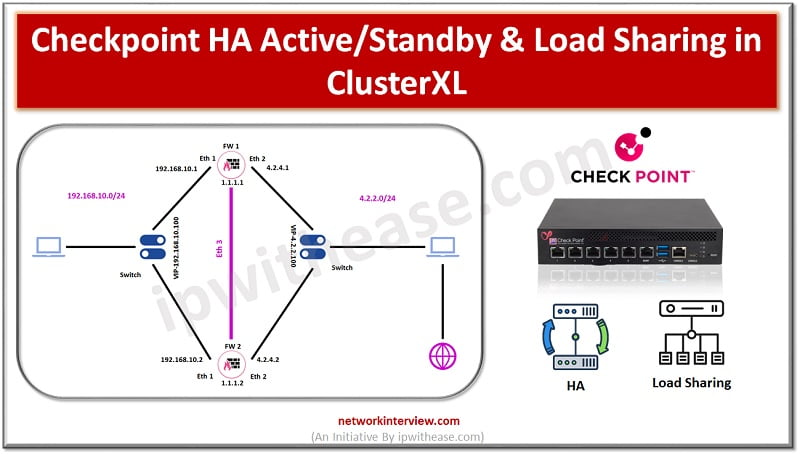
Checkpoint HA Active/Standby and Load Sharing in ClusterXL
Checkpoint HA
High Availability is the feature of firewall in which it eliminates the single point of failure in the network. Two firewalls make a cluster and act as an active passive mode.
Active firewall handles the network traffic while passive firewall takes over the traffic once a failover happens in the network.
Let’s discuss the topology and start HA configuration in Checkpoint Firewalls.
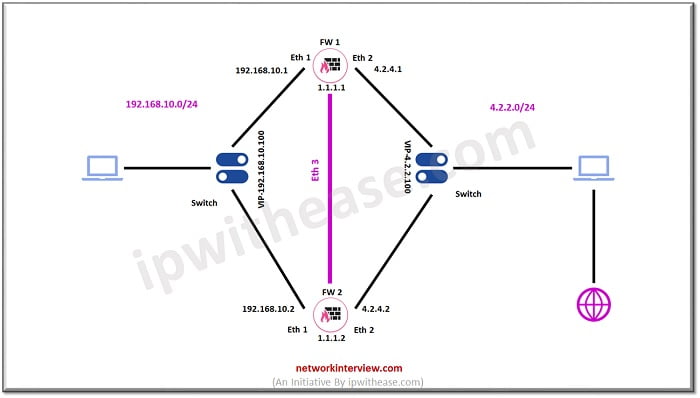
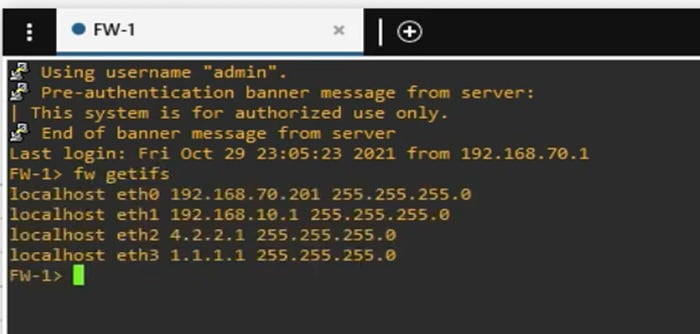
Access FW1 through CLI and check interface status and IP addresses
Run command -> fw getifs
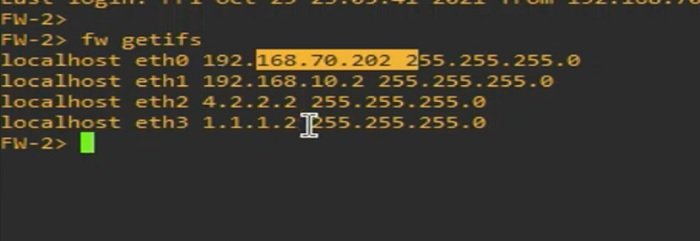
Similarly, login to other Firewall->FW2 and check interface status and IP addresses
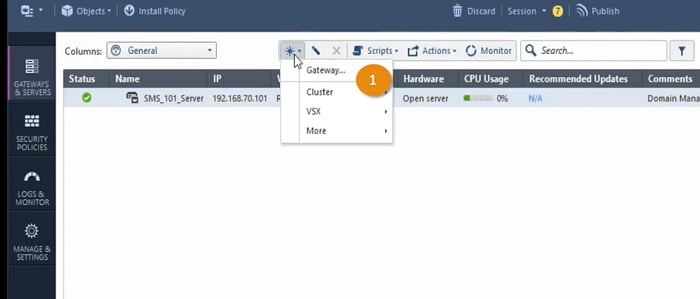
Add Gateways in Checkpoint Smart Dashboard
1 Go to Smart Dashboard and click on Gateway and Services and select add Gateway
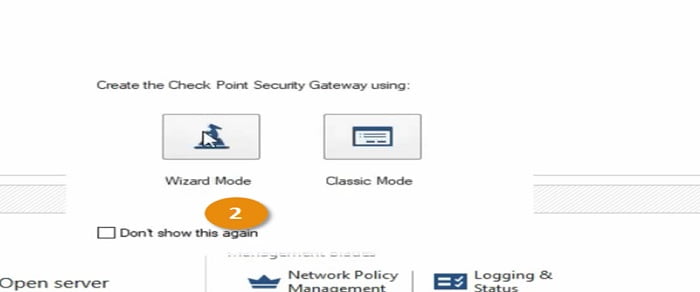
2 Select Wizard Mode
3 Add firewall -> FW1 details in the Wizard section and Add Firewall 1 management IP address and select NEXT
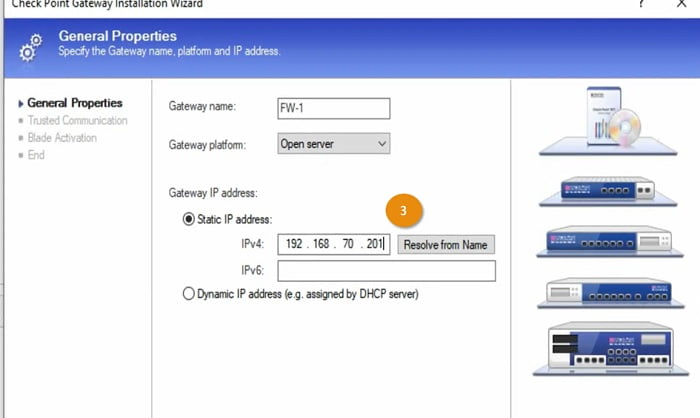
4 Provide SIC Key (any password which you can remember, here I set Nam@123) in the next tab and apply it to the firewall
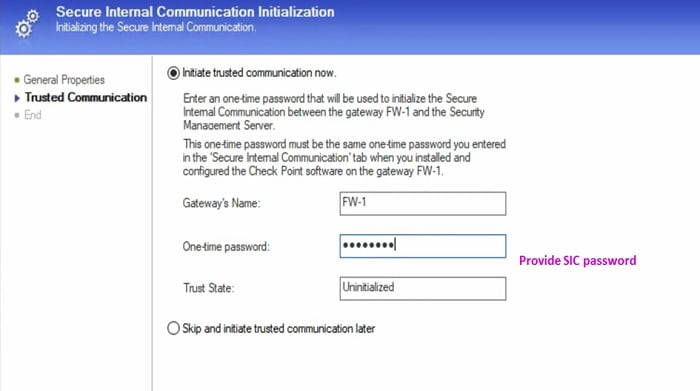
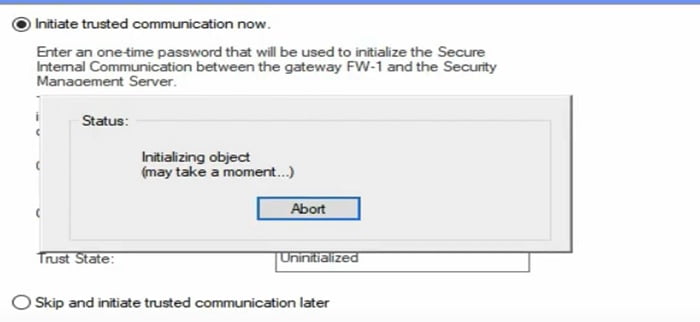
5 Firewall initiate SIC communication
In a similar manner add Firewall -> FW2 in the Gateway and established SIC key
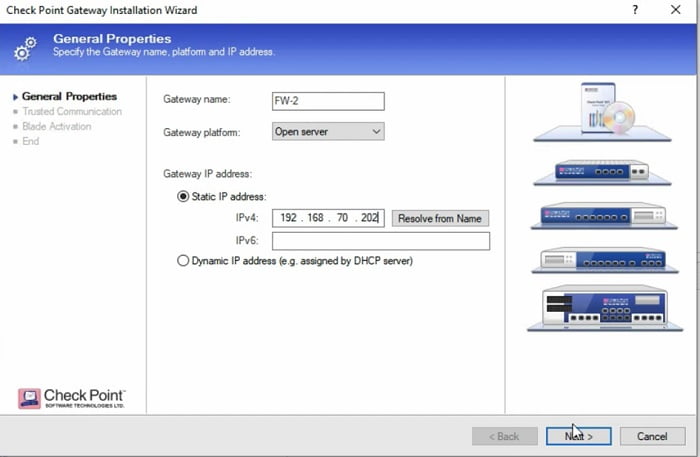
Note: SIC password must be same in both FW1 and FW2 to establish the trust.
Add Cluster in Checkpoint Smart Dashboard ->FW1
1 Here Go to Cluster- > Select Cluster Option

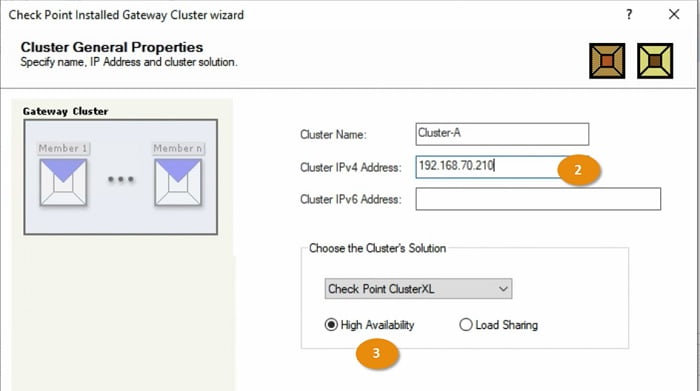
2 Add FW 1 details in cluster values
3 Select Cluster option -> High Availability -> Select Next
4 Add Gateway in the cluster and select Existing Gateway
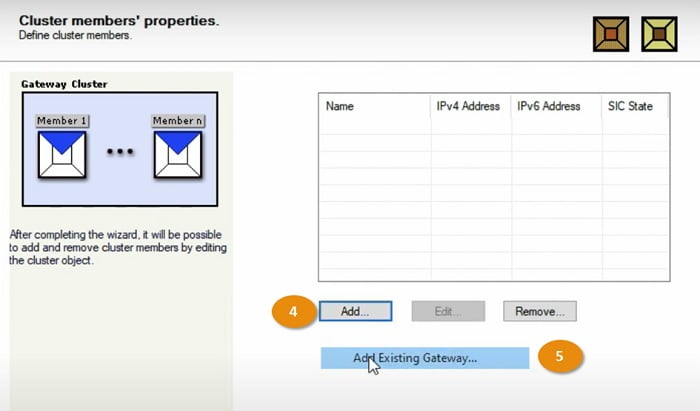
5 Add Existing Gateway in the configuration
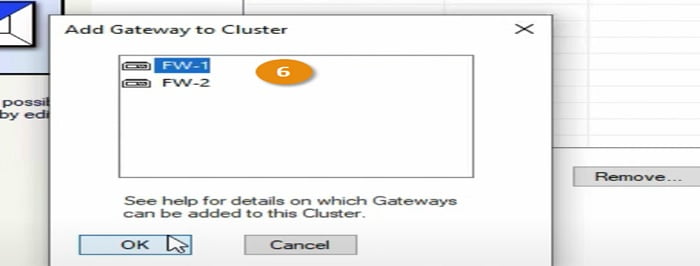
6 Select FW and choose option ADD
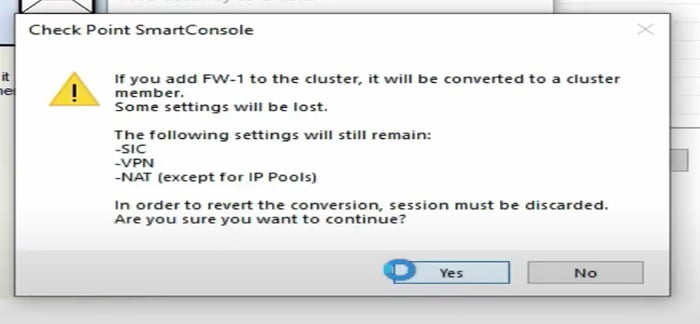
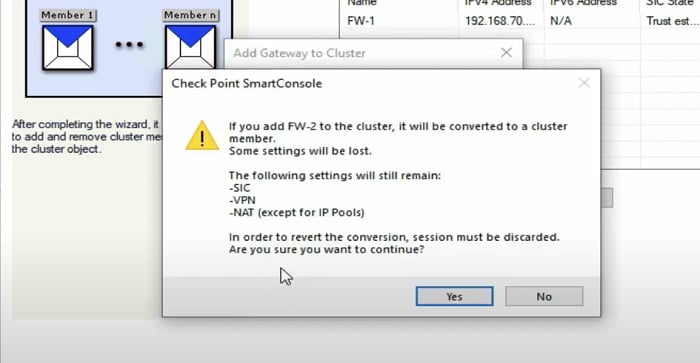
7 Firewall prompt warning regarding the Cluster member, select Yes to proceed ahead
Add Cluster in Checkpoint Smart Dashboard -> FW2
In a similar manner add another Gateway -> FW2
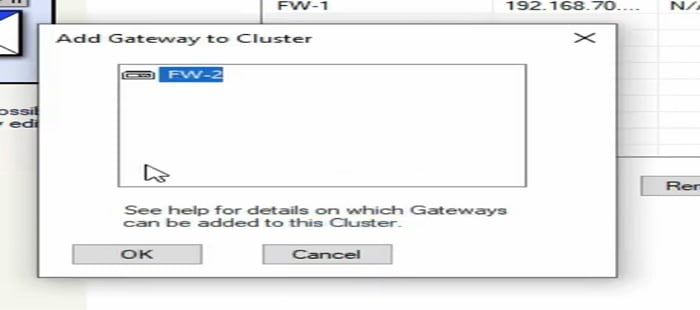
Smart Dashboard prompts the cluster message on the screen.
Click OK to proceed ahead.
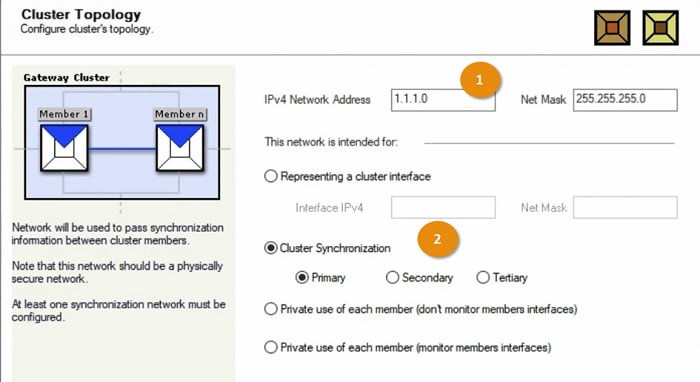
Cluster Topology
Click Next and add Cluster Topology for FW1 and FW2
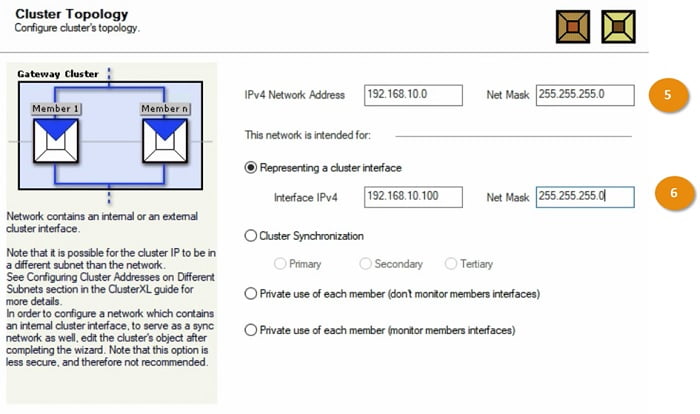
1 Add IPV4 subnet of Cluster
2 Add cluster synchronization -> Primary -> Click Next
3 Add External facing subnet in the Cluster topology
4 Add Cluster Interface which will be represented by firewall
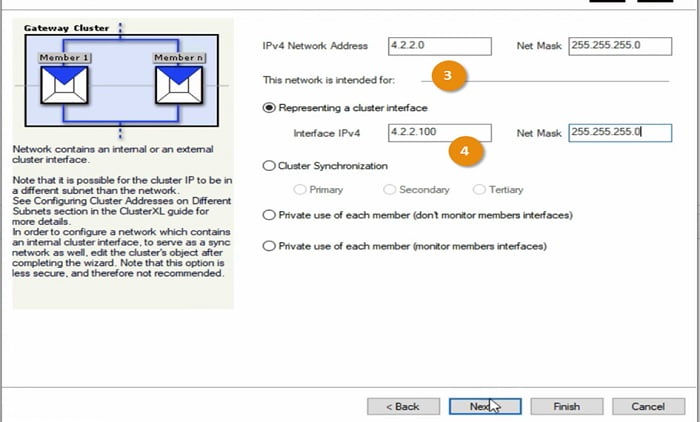
5 Add internal connected subnets in the Cluster Topology
6 Add cluster interface in the topology
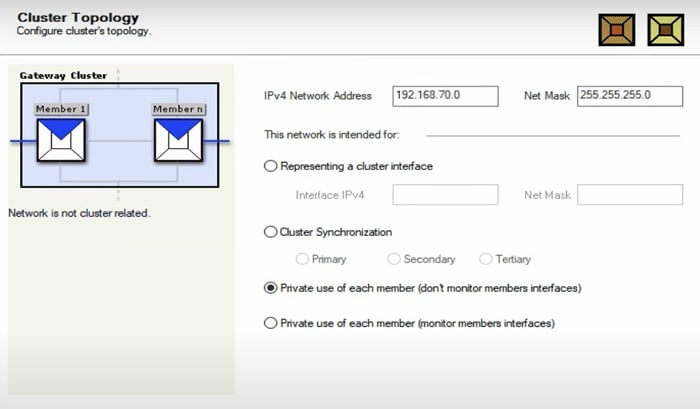
Now add another interface with Private IP address and keep the interface in Private mode which means if management interface goes down then traffic remains at Primary interface and doesn’t perform failover.
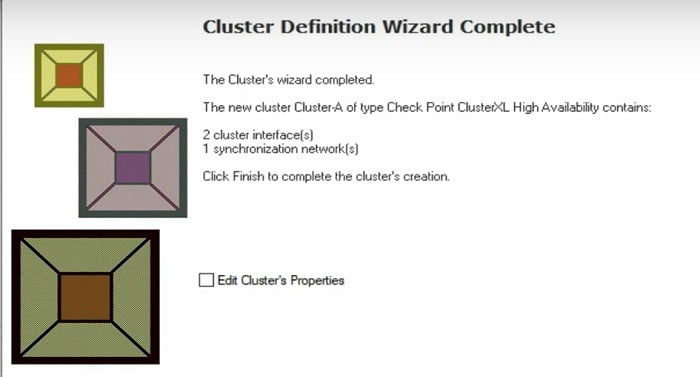
Cluster Configuration has been completed.

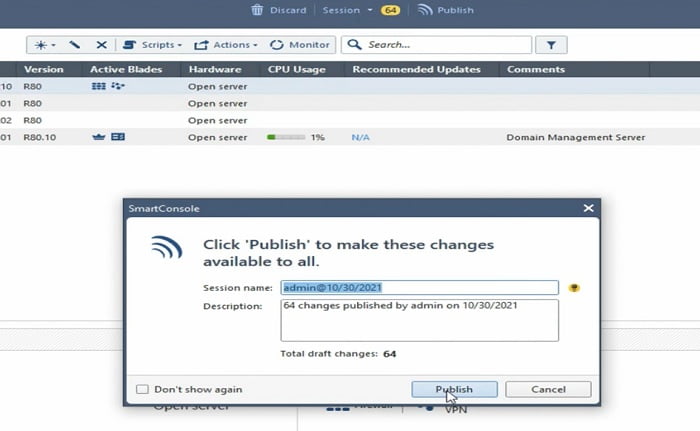
Install the changes on the Gateway and publish it.
Cluster Verification
Verify the cluster status from FW 1 and FW 2
1 Login to FW1 and run command
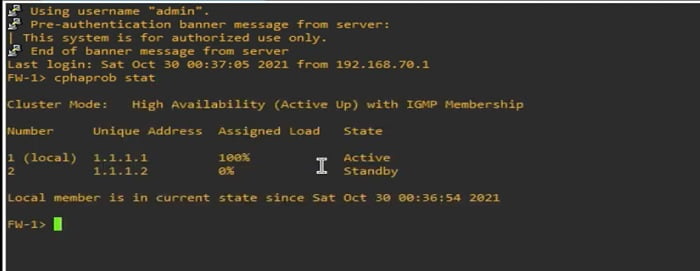
>>Cphaprob status -> Firewall display status of active standby firewall
100% assigned load means firewall is Active
0% assigned load means Firewall is Passive
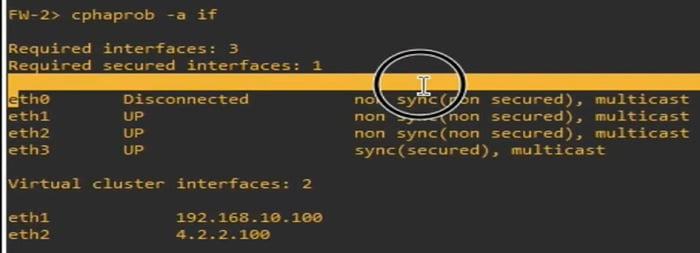
Further check HA interfaces and their status by using below command
>Cphaprob -a if
Enable Load Sharing in Cluster
ClusterXL Load Sharing is a mechanism that divides traffic among the members of a cluster in order to maximize the overall throughput. All functioning cluster members are active and handle network traffic in an Active/Active setup. If one member of the cluster becomes inaccessible, the remaining operational members will take over and provide High Availability, with all connections being shared smoothly between the remaining Security Gateways.
It should be noted, however, that Load Sharing modes of ClusterXL do not support IPv6.
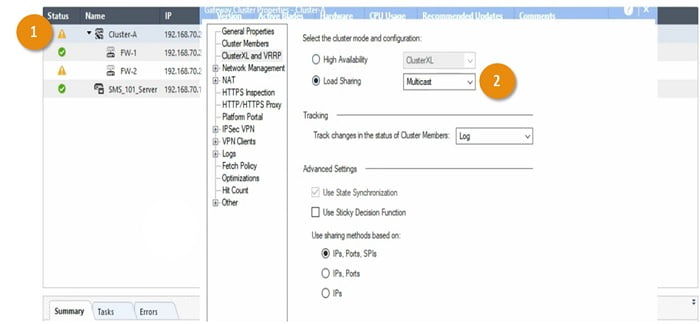
1 Go to Cluster member Cluster A and double Click the tab
2 Select ClusterXL and VRRP -> Enable Load Sharing with Multicast option
Click OK to finish the configuration.
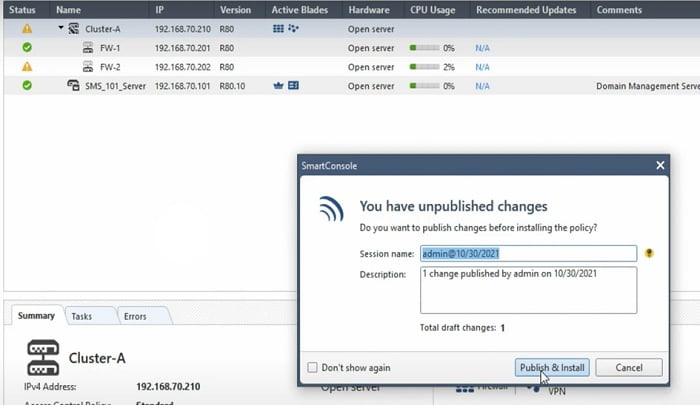
Install policy and publish the change.
Verify Load Sharing in Cluster
Login to FW1 and check the cluster status by using below command
>>Cphaprob stat -> output shows that Load sharing is divided into 50% and 50%
>>50% for Active Firewall
>>50% for Passive Firewall

Continue Reading:
Fortinet FortiGate HA (High Availability): Detailed Guide
Tag:Checkpoint

