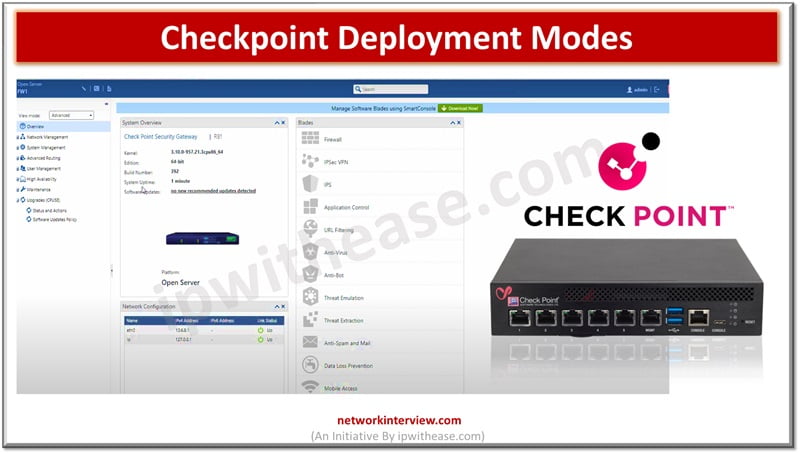
Checkpoint Deployment Modes
There are few ways to deploy Checkpoint Firewall in the network.
- Standalone Deployment
- Distributed Deployment
Here, we will discuss Standalone and Distributed Modes of Checkpoint Deployment. Let’s start with Standalone Mode.
Checkpoint Deployment Modes
Standalone Deployment Mode
Both Firewall and Management are installed in the same box in standalone mode.
In this document we will deploy Checkpoint R81 in Standalone Mode. There are two main components in Checkpoint installation
- Security Gateway: Is an Engine that enforces security policies and it is managed by Security Management. Security Gateway is the module which is doing all the work of the firewall.
- Security Management: It is an application that manages and stores the security policies to the security Gateways. Security Policies are written on the management server and enforced to the security Gateway.
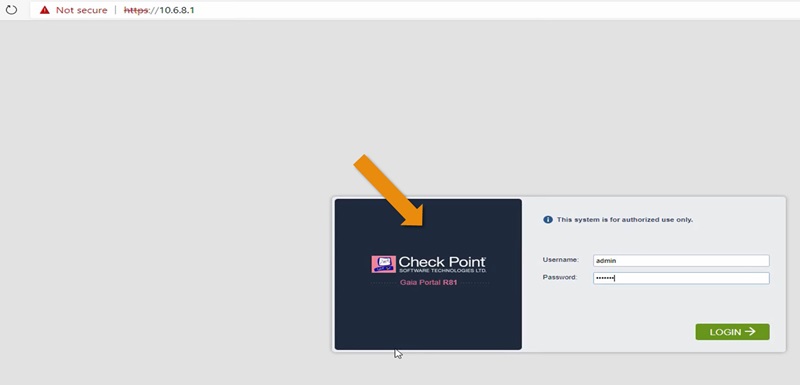
- Connect to the Device either by using Console Cable or WEB GUI IP address.
- Login to the device by using default credentials username – admin, password admin or none.
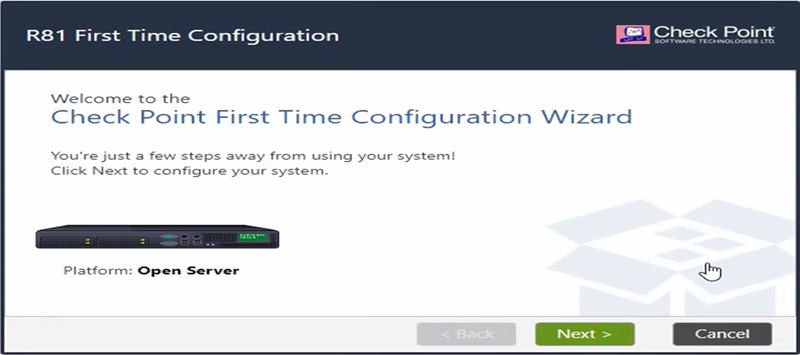
- First Time Wizard Window Prompt, Please click on NEXT.

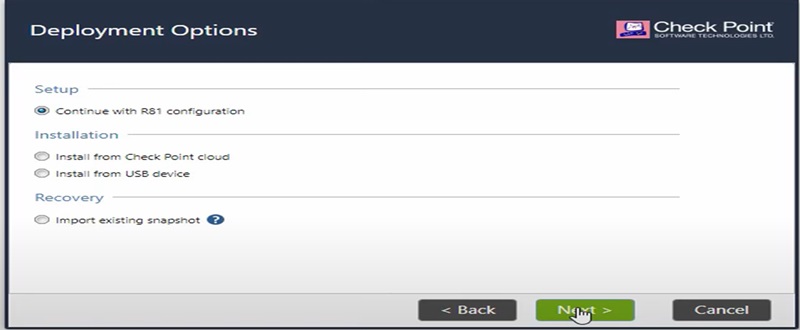
- In next option select Continue with R81 Configuration option and click on NEXT.

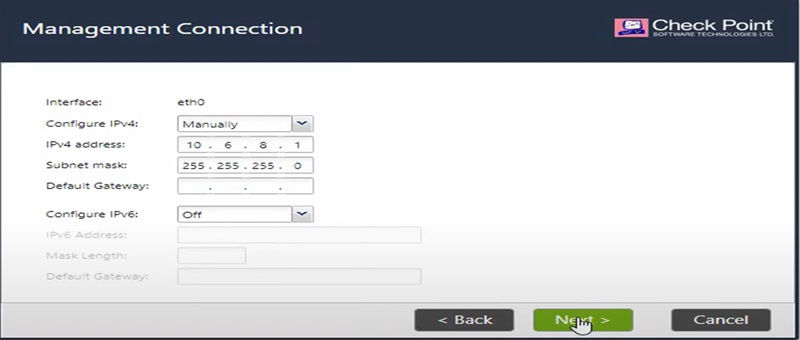
- Provide management interface IP address manually on the eth0 interface and select NEXT.

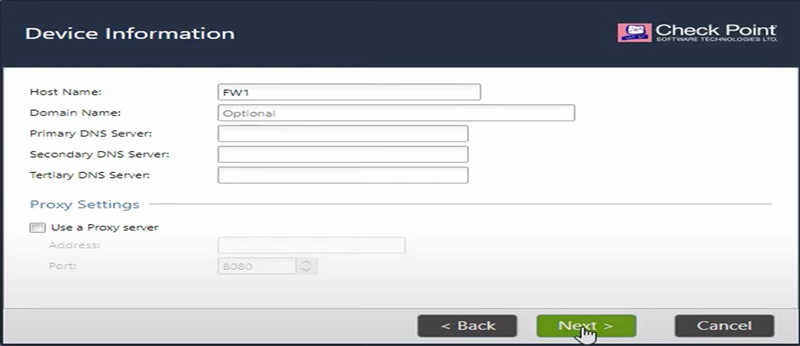
- Select device Hostname and DNS values in below tab to setup the configuration and proceed ahead for option NEXT.

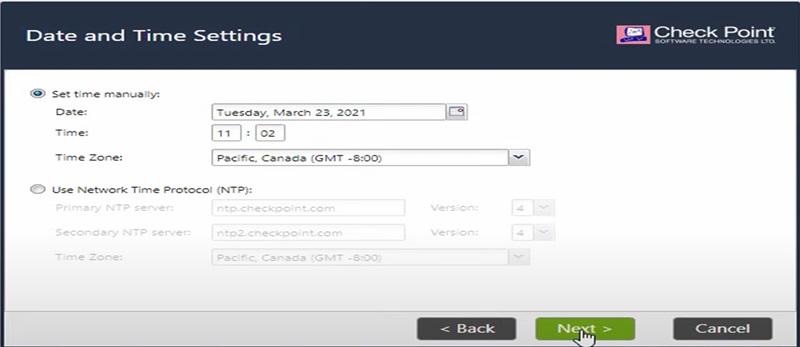
- Setup date time and zone of the firewall physical location.

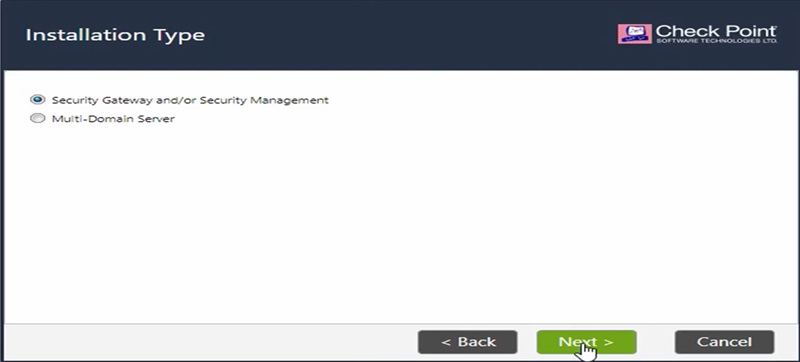
- Select Installation type.

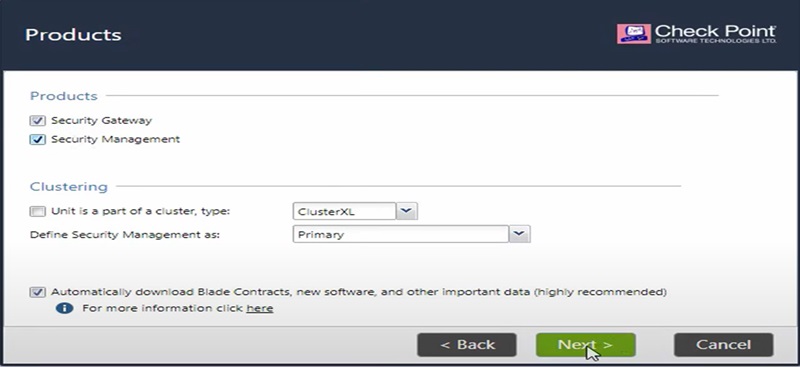
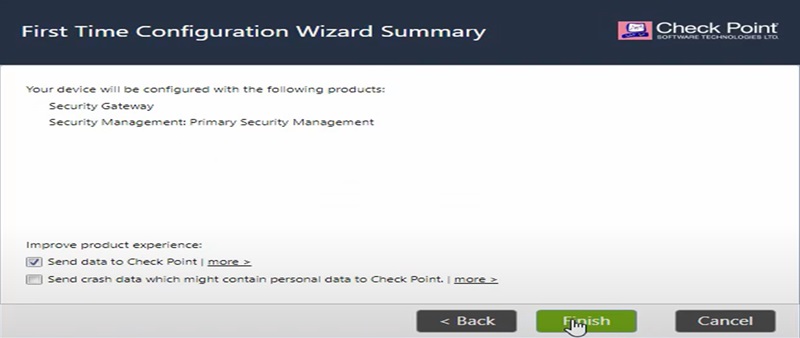
- We are doing Standalone deployment hence we are selecting both Security Gateway and Management Server in Products.

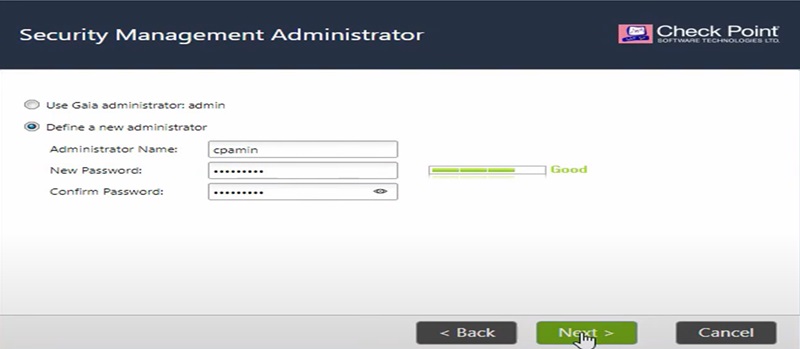
- Select administrative password and click on NEXT.

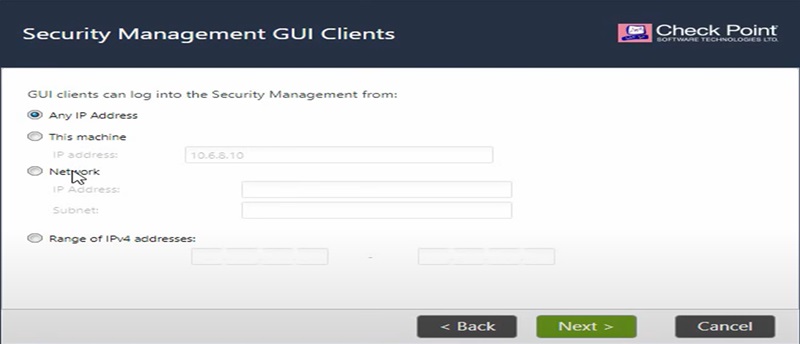
- Select management IP address ranges or single IP address to connect with Checkpoint device.

- Click on finish as first-time wizard installation is completed.

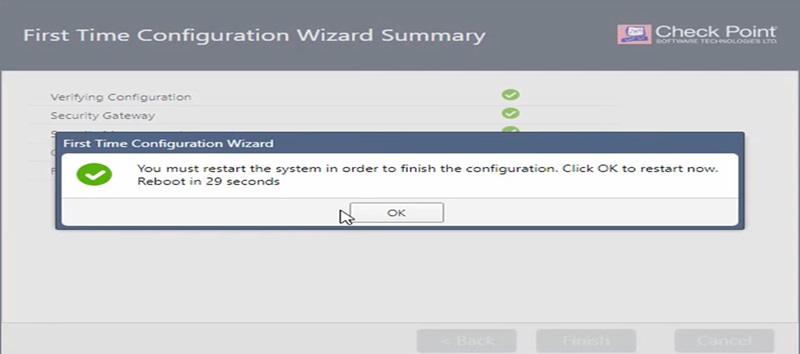
- Once installation is done, firewall will verify and configure and takes the reboot.

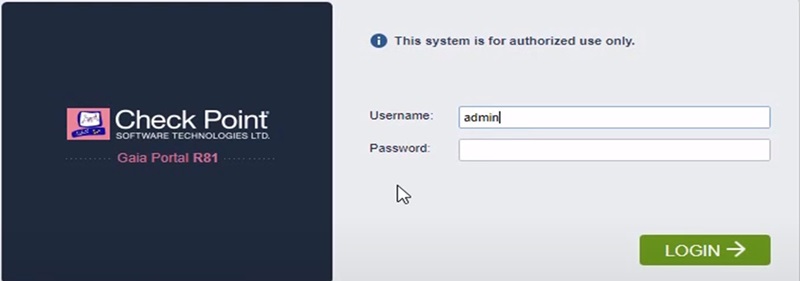
- After reboot, firewall comes to the login page again.

After login you have entered to Checkpoint dashboard from where you can edit the configuration and create policy in Checkpoint Firewall.
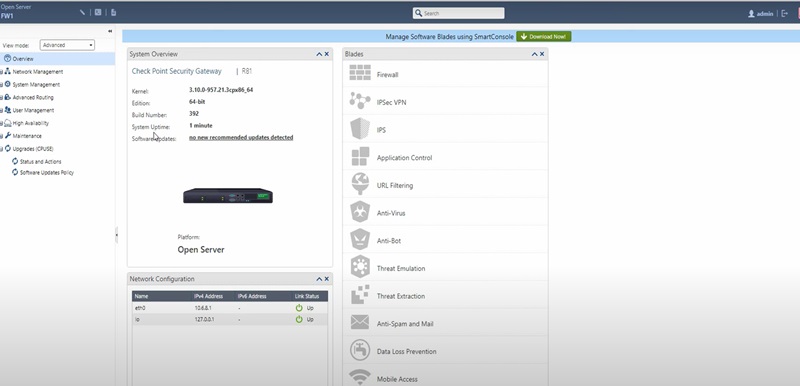
Now, move to Checkpoint Distributed Mode Deployment.
Distributed Deployment Mode
We need two different devices to do Distributed deployment
- One single machine to deploy Gaia OS instalment with Firewall application
- Another machine to install Gaia OS for SMS application (Secure Management Server)
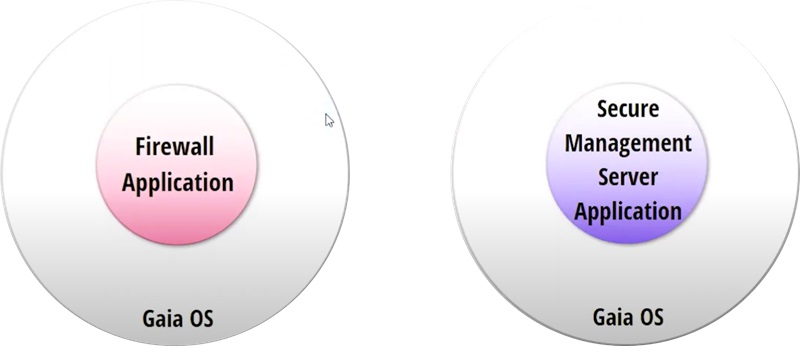
We are using the below topology to configure distributed deployment in the network.
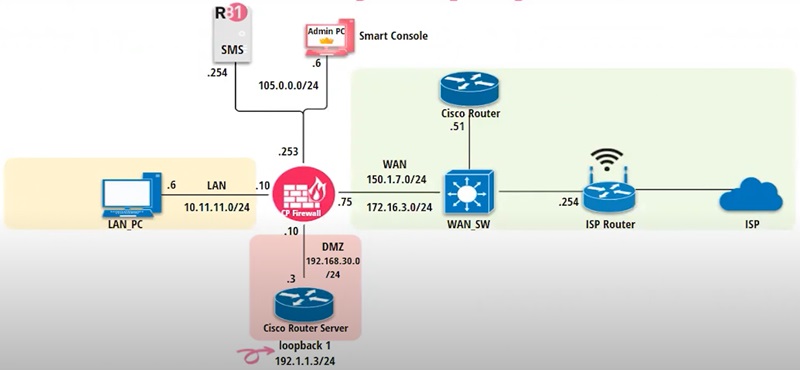
Let’s start the configuration in Smart Manager Server (SMS)
- Login to the SMS device by using admin credentials (username admin password admin or admin123) and check the interface configuration
- You need to change default IP address of eth0 and configure eth0 interface with new IP address as per your network topology
- Set interface eth0 ipv4-address <address you want to give> mask-length 24

- In a similar way you can assign interface IP address to the Firewall as well
- Login to firewall console and provide below IP address to eth0 interface

- Now, open Web GUI of SMS -smart management server and Firewall by using command https://105.0.0.254 (SMS) & https://105.0.0.253 (Firewall) in browser
- You need to run First time Wizard once you login into the SMS GUI (which we have done in standalone deployment)
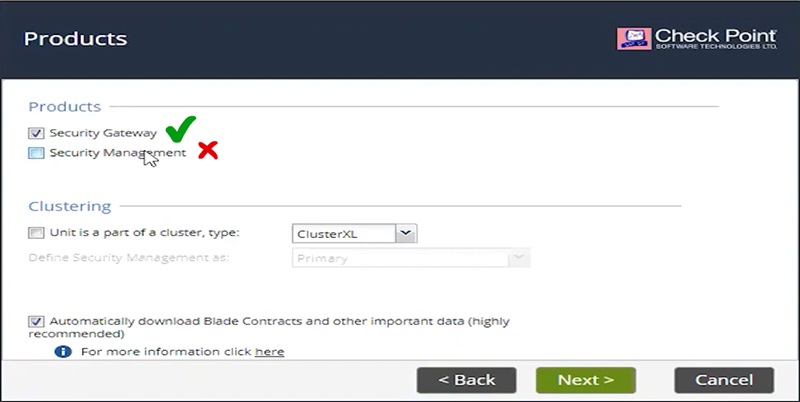
- Only select Security Management instead of selecting both as we are installing first time wizard in a security Management device.
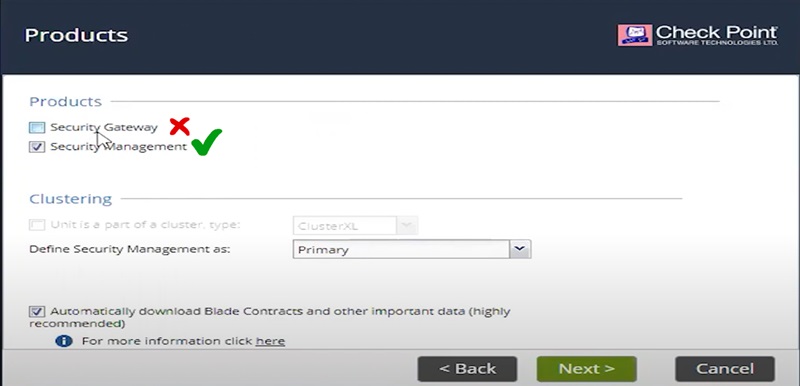
In a similar way you can run the One-time Wizard in Firewall GUI
1.Login to https://105.0.0.253
2.Admin, password admin123
3.Run first time wizard (same as standalone deployment)
4.Only exception is to select “Security Gateway” in firewall deployment
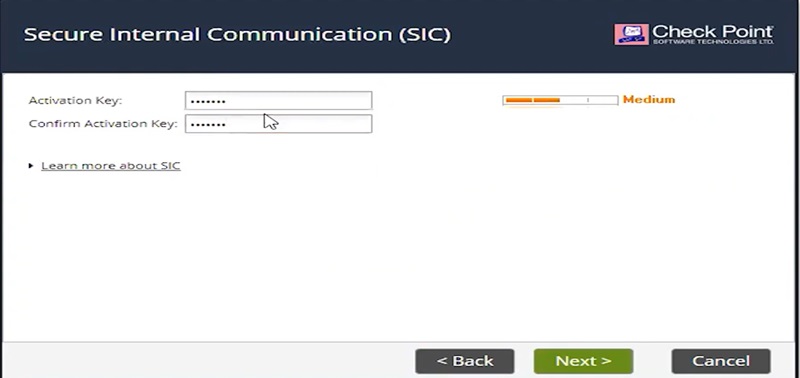
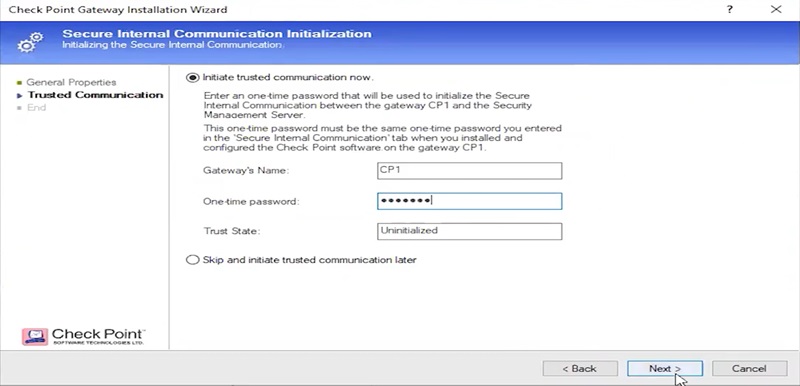
5.Apply Activation Key in Firewall’s One time Wizard which is kind off one-time password which is used to integrated with SMS server during the sync
6.I have put “123@test” password for integration with SMS
Once installation of first-time wizard completed both Firewall and SMS takes the reboot.
7.Login to Smart Console to connect with SMS and sync with Firewall
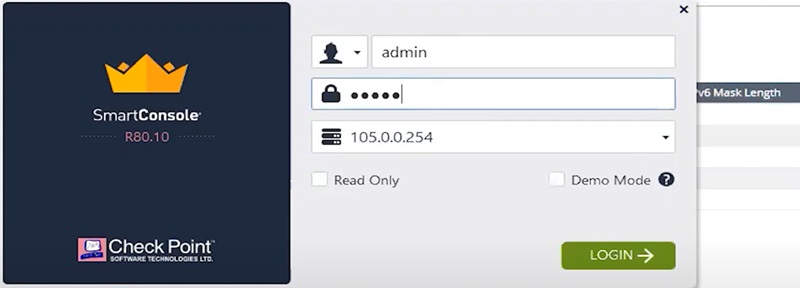
8.This is how SMartConsole looks like < see below image >
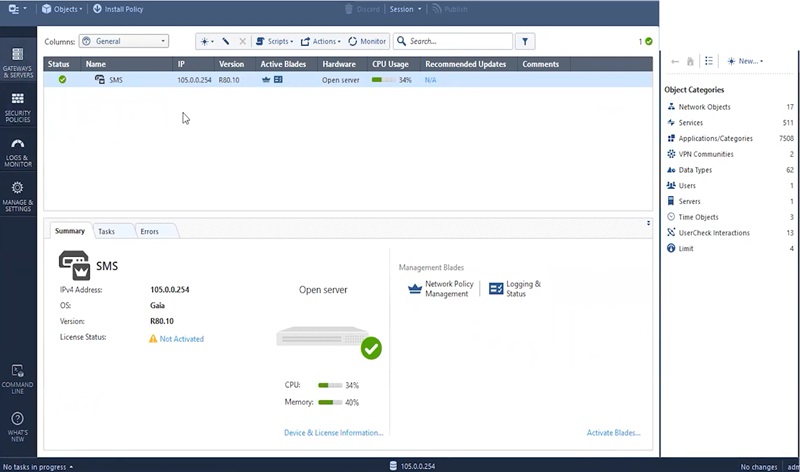
9.Integrate Gateway with Firewall and SMS server
10.Go to Gateways🡪 Wizard Mode🡪 Gateway Name
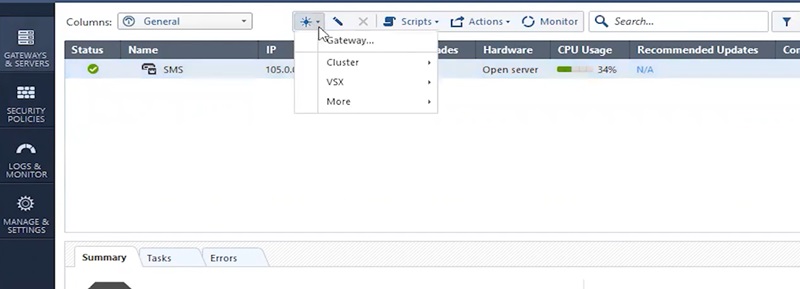
11.Add details in General Properties
12.Add Device Name
13.Add Firewall IP address
14.Add Gateway Platform (Device Model Number)
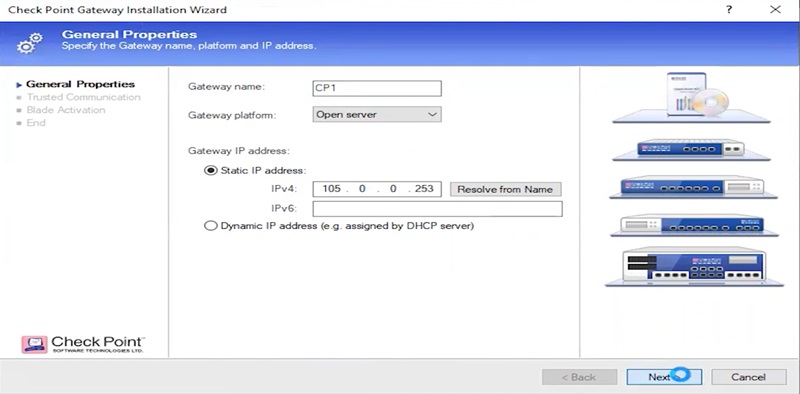
15.Go to Trusted Communication 🡪 Establish the SIC- Secure Integrated Communication (One-time password which we have given in firewall as Activation-Key and Click NEXT
16.Go to End 🡪 Select FINISH
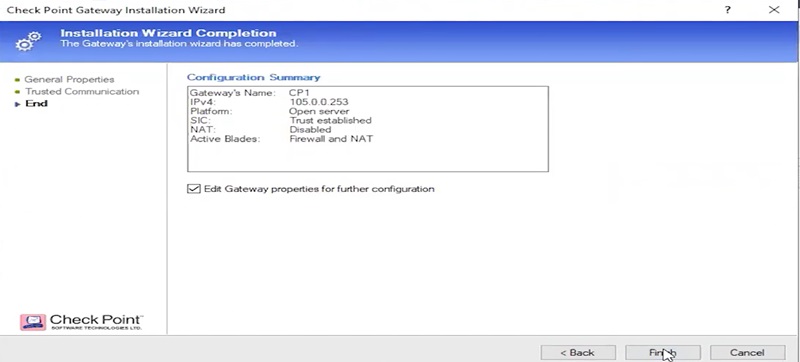
Firewall successfully integrated with SMS server and added to SmartConsole Gateway

Checkpoint Distributed Mode Deployment Completed!
Thanks for reading!!!!
Continue Reading:
Palo Alto Interface Types & Deployment Modes Explained
Tag:Checkpoint

