SSL Inspection in Checkpoint Firewall
Encrypting SSL traffic is critical for user privacy and to securely conduct business across the net. Indeed we have seen a huge rise in websites shifting to SSL in recent years. This is a good thing however traffic can be used to conceal attacks. To prevent threats we need the ability to look inside the encrypted traffic.
Here, we will discuss SSL inspection technology of Checkpoint Firewall and how it does work.
SSL inspection policy allows our advanced security Function to analyze the content of encrypted network traffic. With SSL inspection our gateway can force the same level of security on encrypted traffic as they do with clear traffic.
SSL Inspection
How SSL is used by browsers to establish secure communication with web sites on the Internet.
We will be using https://facebook.com as an example.
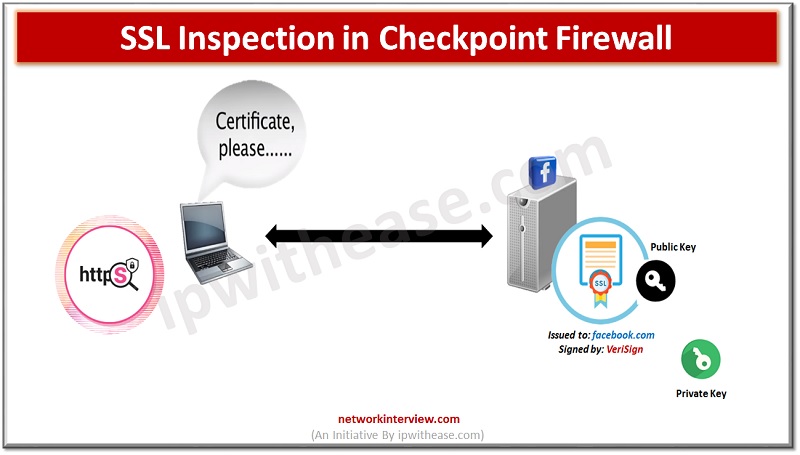
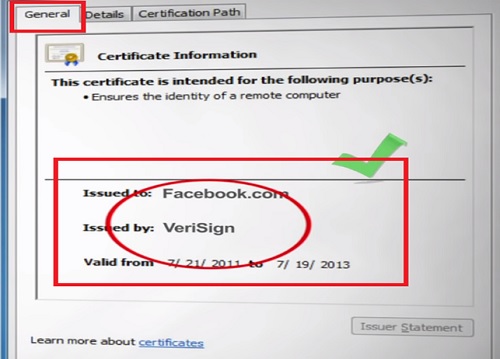
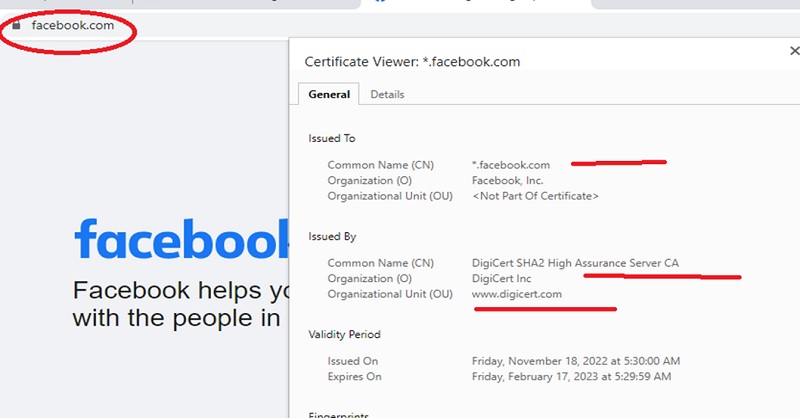
Notice the browser is using HTTPS. Where “s” denotes that the HTTP session is encrypted with SSL. The first function of SSL is to establish the trust of a web server if the server has a Digital Certificate that was issued by a trusted certificate authority or CA that is vetting the site’s identity. The SSL handshake starts off with the web server sending its certificate to the browser.
Facebook web server needs a way to prove it’s the rightful owner of the certificate. For this Facebook has a file called a private key which is cryptographically paired with its certificate, without possession of Facebook’s private key no one can forge its certificate and Impersonate the site on the web. This is a key part of SSL.
Facebook Certificate is signed by a CA named VeriSign. Our browser searches for VeriSign certificates and its store of trusted CA certificates.
On Windows the list of trusted CA is maintained by Microsoft.
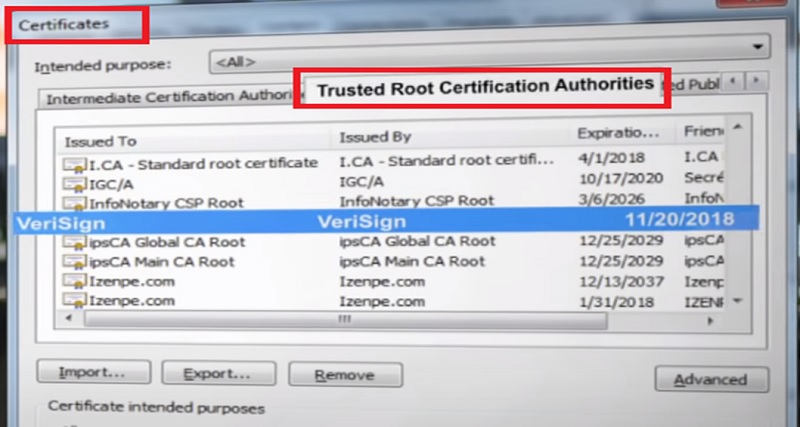
In our example the VeriSign Certificate is found in the trusted store and so the browser decides to trust Facebook Certificate
Now that the SSL cryptographic Validation is done and browser trusts the website browsing commences using SSL encrypted communication.
Enable SSL Inspection in Checkpoint
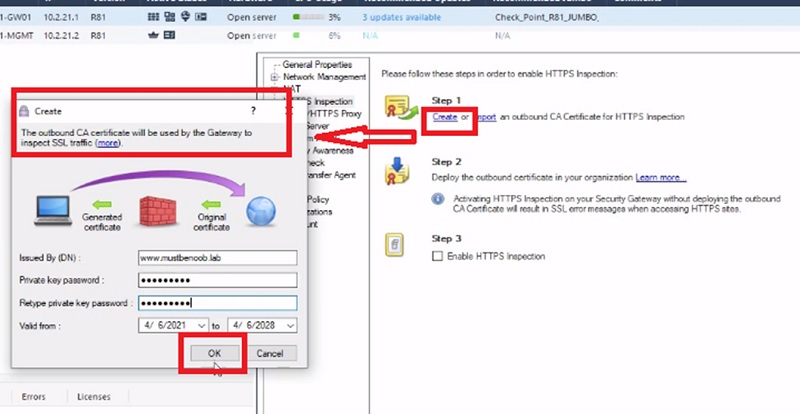
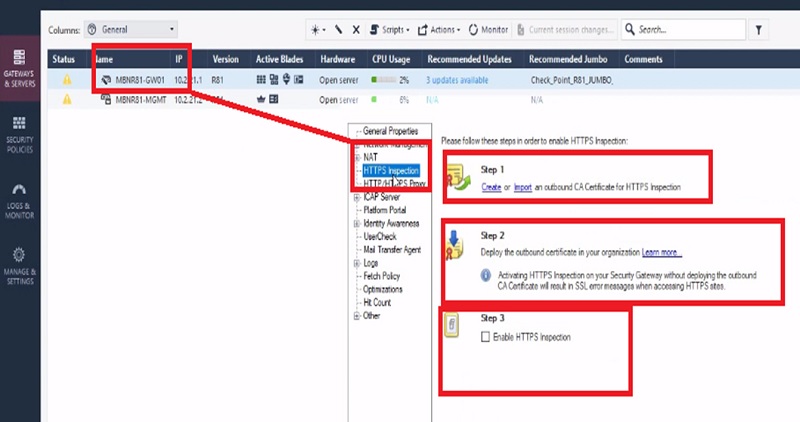
Let’s visit Facebook again and now we are going to turn on the checkpoint SSL inspection. From the HTTPS inspection page on smart dashboard, the first step for enabling SSL inspection is to create a CA certificate to be used by the Gateway for signing.
Step-1. We provide a certificate name, validation date and a password that will protect the private key.
Step-2. Export/download certificate from Checkpoint Firewall to local machine.
Case I Download the certificate and install it on user’s machine if list of users are less like 2-10 users
Case II if numbers of users are very high then pushes the certificate through Active directory Group policy to all users’ systems.
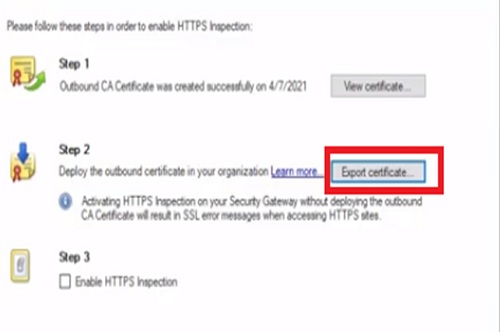
Step-3. We will then enable HTTPS inspection.
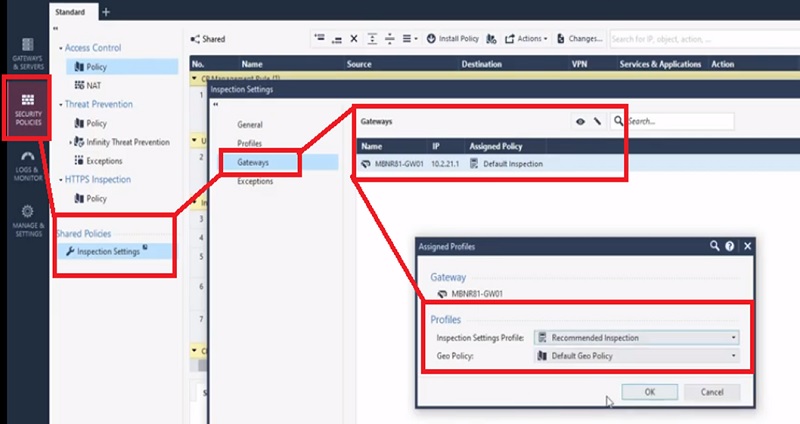
Step-4. Enable recommended inspection policy in Inspection Settings of the firewall
Go to -> Security Policies -> Inspection Settings -> Gateways -> SELECT Gateway -> recommended Inspections
Traffic Flow after Enabling SSL Inspection
Now our gateway is performing SSL inspection.
1. Let’s browse Facebook again and see what happens this time.
2. The gateway sees the browser’s SSL request and rather than letting the request who initiates its own as SSL session with Facebook pretending to be our browser, like the browser the gateway has its own trusted CA store which it uses to validate the critical in order to preserve the trust validations to normally carry out by the browser.
3. Once the connection between the gateways and facebook is established, the gateway creates and SSL certificate that is very similar to that of Facebook.
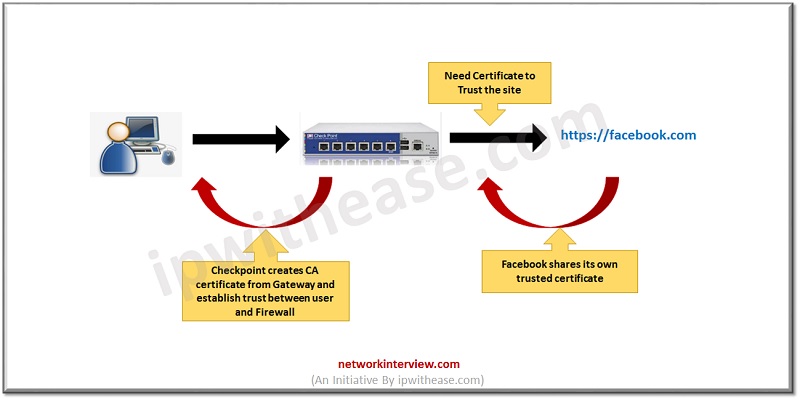
4. That Certificate has its own private key associated with it the gateway signs the copied certificates using the CA certificate we created for the Gateway (Step 1).
Now the Gateway completes the SSL session with our browser pretending to be Facebook and using the just created certificate.
We can also prevent threats concealed in SSL by enabling IPS, anti-virus and other software blades.

Continue Reading:
Tag:Checkpoint, Security


