SD-WAN is a software defined networking approach wherein hardware is separated from the control plane. SD-WAN is an ideal technology for cloud and on prem deployments. It is a consolidation of transport connections, underlays, monitor and load balancing traffic across WAN links. To control traffic across different sites VPN overlay networks are built upon the underlays.
SD-WAN zones allow grouping of underlay and overlay interfaces and are used in policy management.
In today’s topic we will learn about SD-WAN zones, its features, how to create SD-WAN zones, assign SD-WAN members to zones, configure policy for SD-WAN zones.
Related: FortiGate SD-WAN Fundamentals
About SD-WAN Zones
SD-WAN zones are the logical grouping of SD-WAN members to assign policies, static routes and SD-WAN rules. SD-WAN interfaces can be grouped together using multiple zones. SD-WAN zones are used by firewall policies, interfaces of source and destination. They provide more granular control of networks. The SD-WAN members can’t be assigned to policies directly. SD-WAN members can’t be shared between multiple SD-WAN zones.
Creation of SD-WAN zone (CLI)
Enable SD-WAN and create zone
config system sdwan
set status enable
config zone
edit “vpn-zone”
next
end
end
Creation of SD-WAN zone (GUI)
Step 1: Navigate to Network 🡪 SD-WAN zones
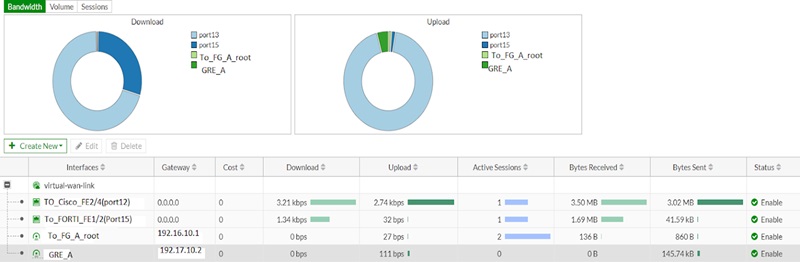
Step 2: click on Create 🡪 SD-WAN zone
Step 3: Provide name for new zone
Step 4: Add SD-WAN members into the SD-WAN (already created ones)
Creation of SD-WAN interface member (CLI)
config system sdwan
config members
edit 1
set interface “To_FG_A_root”
set zone “vpn-zone”
next
edit 2
set interface “GRE_A”
set zone “vpn-zone”
next
end
end
Creation of SD-WAN interface member (GUI)
Step 1: Navigate to Network 🡪 SD-WAN zones
Step 2: Click on Create New 🡪 SD-WAN member
Step 3: Choose an interface
Interface can be set as none and provided later, or Click on +VPN for creation of IPSec VPN (for SD-WAN member)
Step 4: Choose an SD-WAN zone to which SD-WAN members will join.
Step 5: setup gateway, cost and status as needed
Step 6: Click on OK
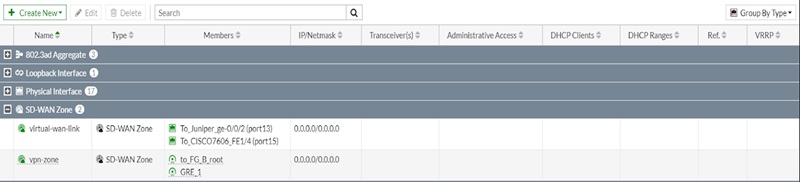
Network 🡪 Interfaces show SD-WAN zones and its SD-WAN members
Policy creation using SD-WAN zone (CLI)
config firewall policy
edit <policy_id>
set name <policy_name>
set srcintf internal
set dstintf vpn-zone
set srcaddr all
set dstaddr all
set action accept
set schedule always
set service ALL
set utm-status enable
set ssl-ssh-profile <profile_name>
set av-profile <profile_name>
set webfilter-profile <profile_name>
set dnsfilter-profile <profile_name>
set emailfilter-profile <profile_name>
set ips_sensor <sensor_name>
set application-list <app_list>
set voip-profile <profile_name>
set logtraffic all
set nat enable
set status enable
next
end
Policy creation using SD-WAN zone (GUI)
Step 1: Navigate to Policy & Objects 🡪 Firewall policy | Policy & Objects 🡪 Proxy policy | Policy & Objects 🡪 Security policy
Step 2: Click on Create new
Step 3: Choose SD-WAN zone for incoming and outgoing interface and configure policy settings as required
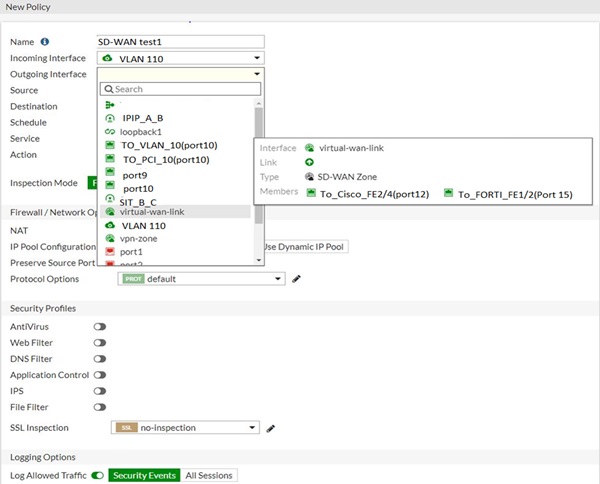
Step 4: Click on OK
You can view SD-WAN zone topology from Security Fabric 🡪 Physical topology or Security Fabric 🡪 logical topology
Continue Reading:
Cisco SD-WAN vs Palo Alto Prisma: Detailed Comparison
Palo Alto Prisma SD WAN: CloudGenix SD WAN