Check Point Routing: Gaia Portal
Gaia is the latest operating system for security applications developed by Check Point. It is named after Gaia, the mother of all in Greek mythology, symbolizing a well-integrated system comprising various components to ensure optimal performance. Gaia OS is designed to support Check Point’s complete range of Security Management products, Gateway, and Software Blades.
Gaia functions as a cohesive security Operating System, merging Check Point’s original operating systems with IPSO, the operating system utilized in appliance security products. It’s accessible for all Check Point Security Appliances and Open Servers.
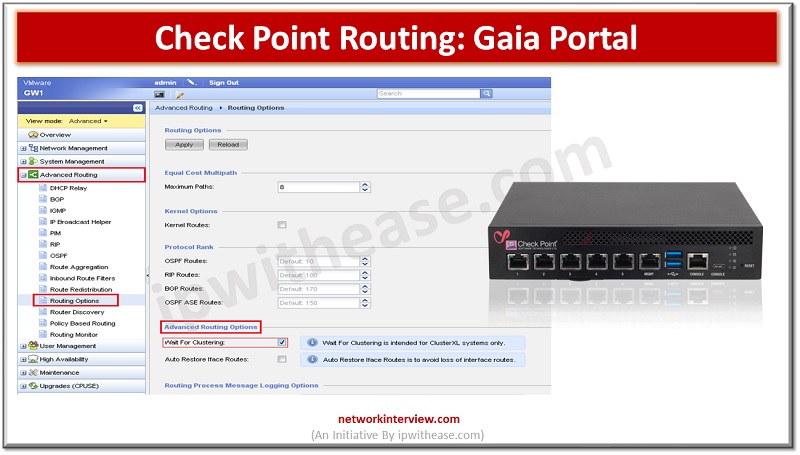
The Gaia Portal is an advanced interface that is accessible through the web for configuring the Gaia platform. This interface allows you to accomplish nearly all system configuration tasks. Let’s understand and configure Check Point routing using Gaia Portal.
Check Point Routing Types
Check Point offers two types of routing:
- Static Routing
- Dynamic Routing- which includes BGP, OSPF, RIP. Here we will discuss BGP and OSPF routing.
Check Point Static Routing R80.10 Firewall
We configure a static route to apply a single destination with one or more paths to reach the destination.
CLI Command to configure the static route in Checkpoint firewall is “set static-route”.
- Static routes is used to add paths for specific destination
- We can add multiple static routes for different destinations by using priorities.
Let’s configure Static route in Checkpoint Firewall
1.Login into Web GUI of the Checkpoint Firewall
2.Select IPV4 Static Routes
3.Go to Add Multiple Static Routes
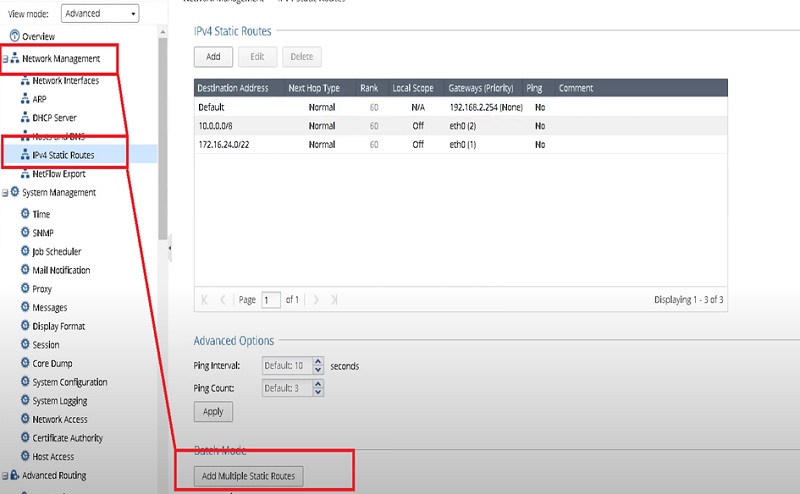
4.Add routes with the IP address of the next hop.
5.Default 192.168.2.132
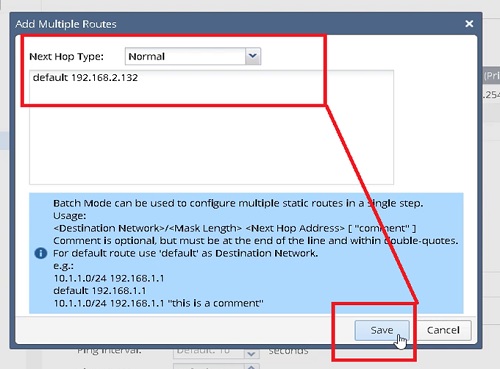
In a similar way if you want to add single static route in the firewall
1.Login into Web GUI of the Checkpoint Firewall
2.Select IPv4 Static Routes
3.Go to Add Static Routes
4.Add destination Route 172.16.24.0 subnet mask 255.255.0.0
5.Add Gateway eth0 (associated interface)
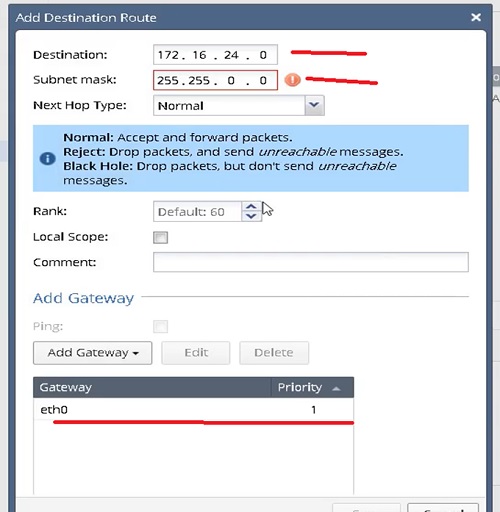
Checkpoint Dynamic Routing /Advanced Routing: BGP Protocol
Checkpoint Dynamic Routing is also known as Advanced Routing.
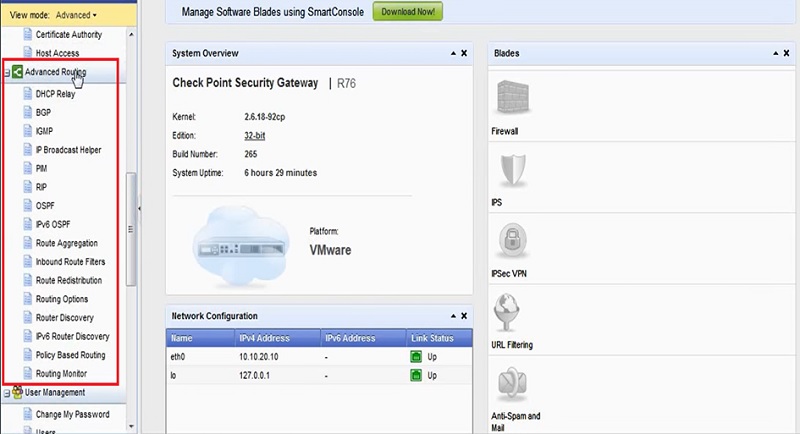
Let’s configure BGP in Checkpoint Web GUI
1.Go to Advanced Routing 🡪 BGP.
2.Add Router ID which is the ID of autonomous System (AS)🡪 Closest ID
3.Select Local Autonomous System Number: 5
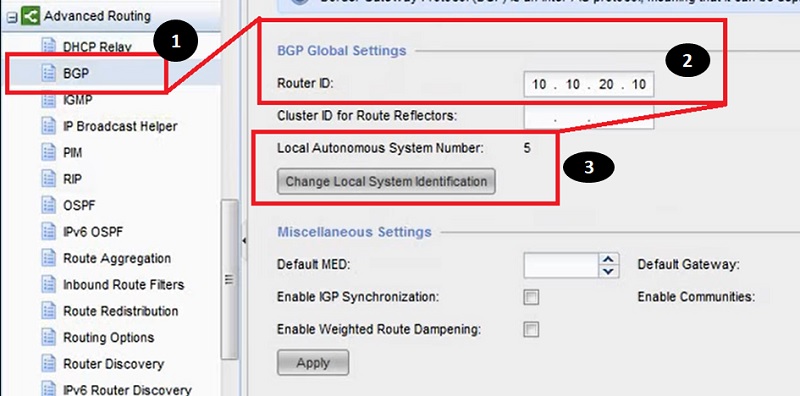
4.Next Move to Miscellaneous Setting in which add Default Route IP address.
5.Default Gateway is a default route which is generated when BGP pairs are UP.
6.Default route has a higher rank than the default static route.
7.Next is enabling the Peer Group Configuration in BGP
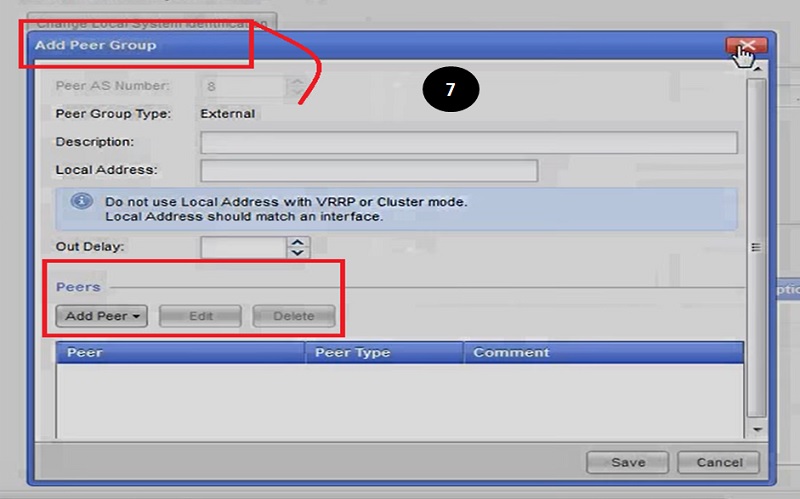
CLI Commands to:
Configure BGP
set bgp external remote-as as_number
{on | off}
aspath-prepend-count <1-25 | default>
description “text”
local-address ip_address {on | off}
outdelay <0-65535>
outdelay off
Configure BGP Peers
set bgp external remote-as <as_number> peer
<ip_address> {on | off}
accept-med {on | off}
accept-routes {all | none}
allowas-in-count {0-10 | default}
as-override {on | off}
authtype {none | md5 secret <secret>}
capability {default | ipv4-unicast | ipv6-unicast}
graceful-restart-helper {on | off}
graceful-restart-helper-stalepath-time <seconds>
holdtime {<6-65535> | default}
ignore-first-ashop {on | off}
ip-reachability-detection
check-control-plane-failure
multihop
off
on
keepalive {<2-21845> | default}
log-state-transitions {on | off}
log-warnings {on | off}
med-out {<0-4294967294> | default}
multihop {on | off}
no-aggregator-id {on | off}
outgoing-interface <finterface> {on | off}
passive-tcp {on | off}
peer-local-as
dual peering {on | off}
inbound-peer-local {on | off}
outbound-local {on | off}
peer-local-as as {{<1-4294967295> | <0.1-65535.65535>} on | off}
removeprivateas {on | off}
route-refresh {on | off}
send-keepalives {on | off}
send-route-refresh {request | route-update} {ipv4 | ipv6 | all} [unicast]
suppress-default-originate {on | off}
throttle-count {<0-65535> | off}
trace bgp_traceoption {on | off}
ttl {1-255 | default}
Configure BGP Reflection
set bgp
internal peer <ip_address> peer-type
none
no-client-reflector
reflector-client
cluster-id {<ip_address> | off}
default-med {<0-65535> | off}
default-route-gateway {<ip_address> | off}
Monitor BGP
>show bgp
Checkpoint Dynamic Routing: OSPF Protocol
OSPF protocol confirms that associated interfaces are functional, OSPF first initiated Hello packets by using the Hello protocol over their OSPF interfaces, to discover neighbours. Neighbours are routers/another device which shares a common area network with firewall interface.
After that, neighbouring routers or devices establish adjacencies and exchange their link-state databases.
Topology Details
1.Loopback IP 🡪 30.30.30.0/24
2.Firewall Internal IP Subnet 🡪 10.10.10.1/24
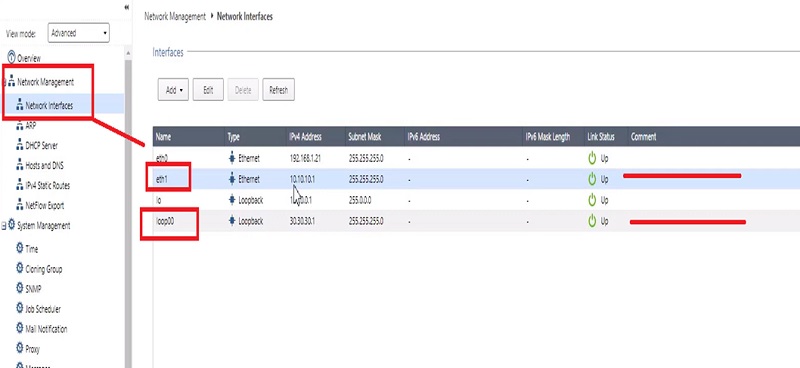
3.Now go to Advanced Routing 🡪 OSPF🡪 Router ID 🡪 10.10.10.1 (Routes will be learnt by this IP address)
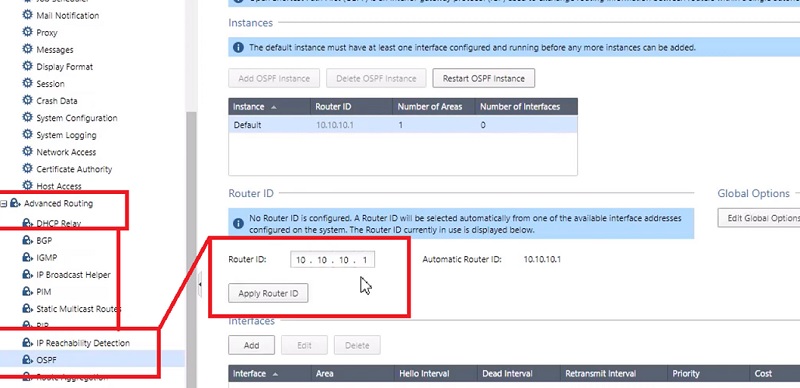
4.Add Interface in the configuration which learns routes and publishes OSPF routes.
5.We have added eth1 where 10.10.10.1 subnet is defined.

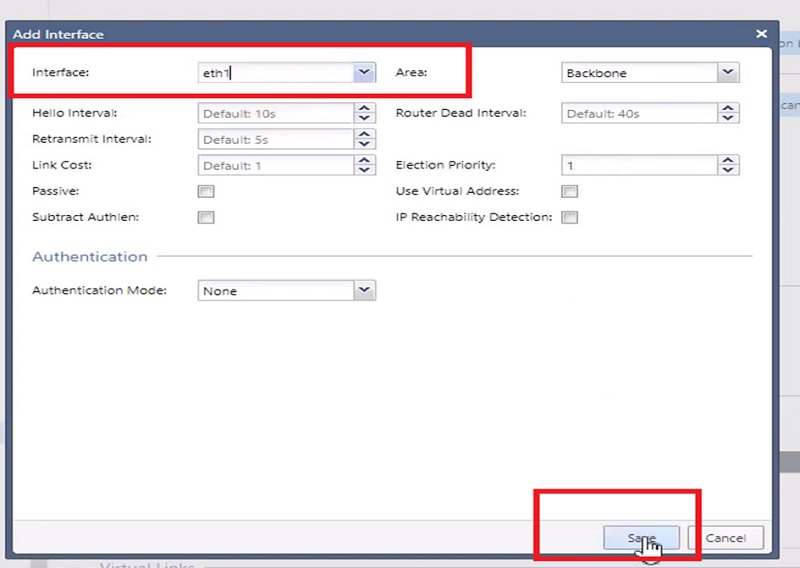
6.Here the interface configuration for OSPF.
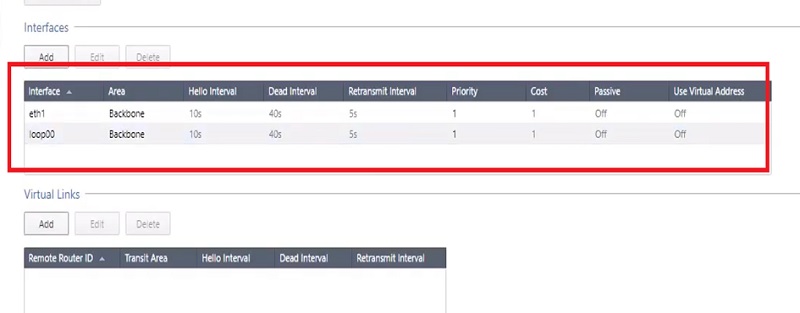
Now OSPF is configured in the firewall.
CLI Commands to:
Configure OSPF in Checkpoint Firewall
set ospf [instance <1-65535>]
default-ase-cost <cost>
default-ase-type {1 | 2}
force-hellos {on | off | timer {default | <2-10>}}
graceful-restart-helper {on | off}
graceful-restart {on | off | grace-period <seconds>}
rfc1583-compatibility {on | off}
spf-delay {default | <delay>}
spf-holdtime {default | <holdtime>}
Configure OSPF Areas
set ospf
[instance <1-65535>]
area {backbone | <ospf_area_name>} {on | off}
range <ip_range>
off
on
restrict
stub
default-cost <1-677215>
off
on
summary
stub-network <ip_range>
off
on
stub-network-cost
nssa {on | off}
default-cost <1-677215>
default-metric-type <1-2>
import-summary-routes {on | off}
range <ip_range> {on | off | restrict}
redistribution {on | off}
translator-role {always | candidate}
translator-stability-interval <1-65535>
Monitor OSPF
show ospf instance <OSPF_instance_number> neighbors [detailed]
Continue Reading:
Checkpoint NAT Policy: Types & Configuration
How to Configure Checkpoint Firewall? Step-by-Step Guide
Tag:Checkpoint


